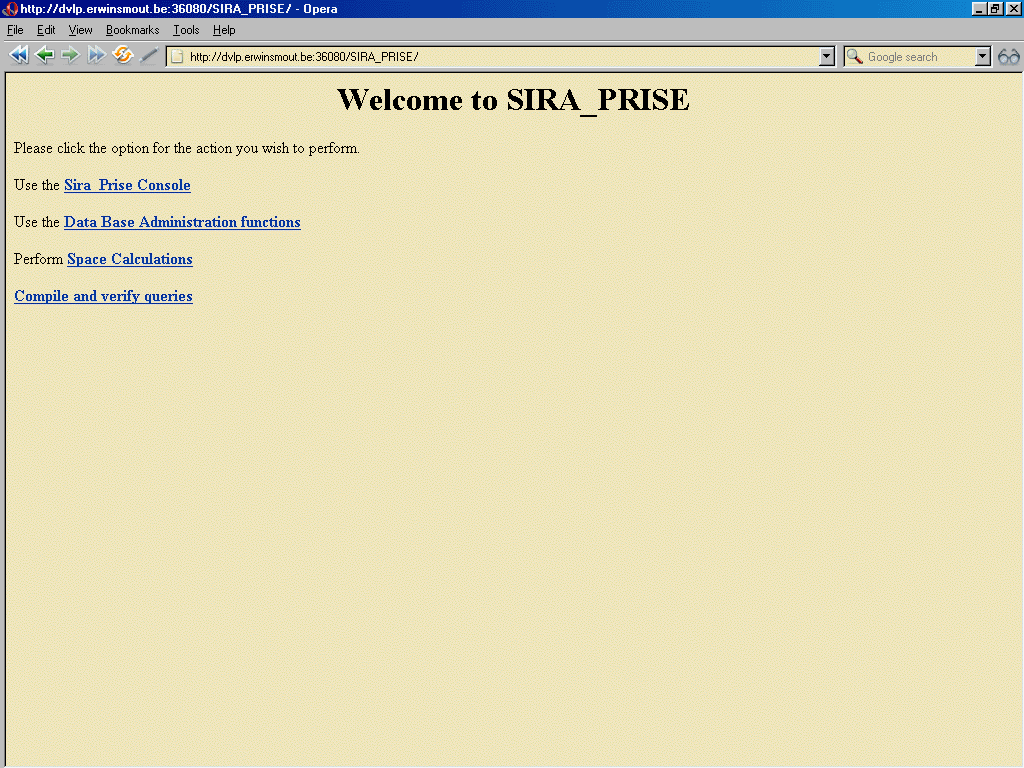
If you have installed the web client correctly in your web application server (and the webapp server is running of course), then you can start using the web client by opening a browser and pointing it to the contextpath of the SIRA_PRISE web application, e.g. http://hostname:36080/SIRA_PRISE.
You should then get to see the welcome screen :

You can click four options here : one to use the console function, which can be used to execute inquiries and/or update commands on SIRA_PRISE servers, one to "test-write" queries, one to perform calculations of physical storage space to be assigned, and the last to use the database administration function on a chosen SIRA_PRISE server. The database administration function is the largest chunk, so we will first make do with the console, compile and space calculation functions.
Clicking any option will first take you to the user information screen. Here you can tell the system about your identity and provide a password, the language you wish to use and the kind of date/time formatting you wish the system to use.
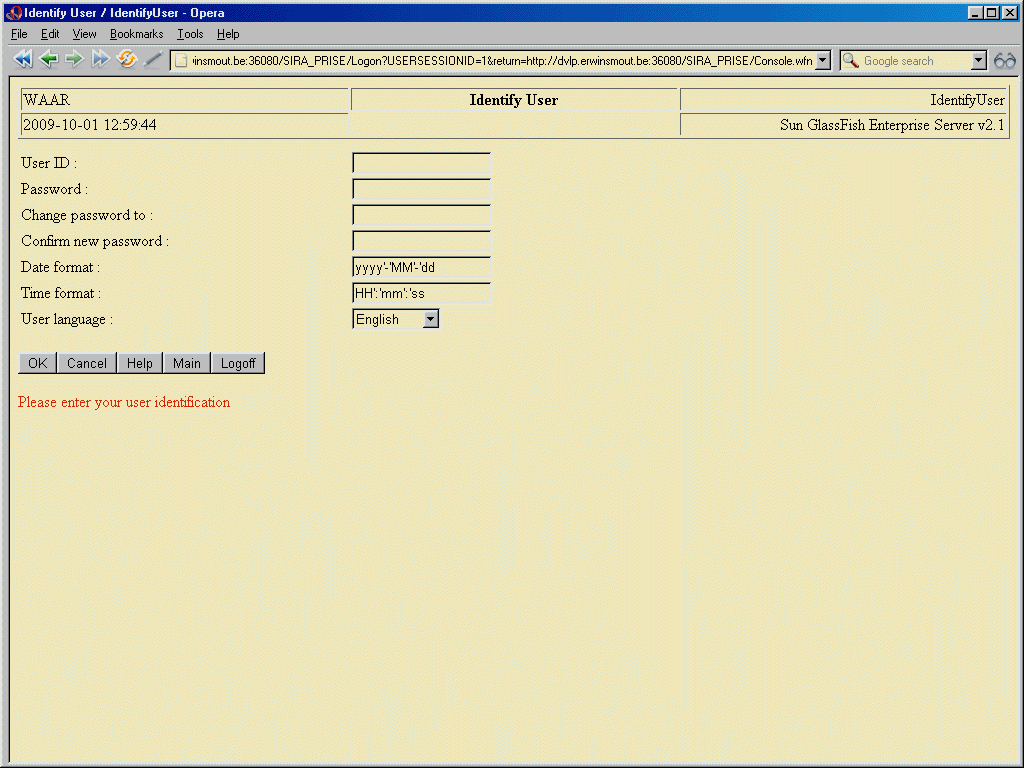
The (contents of the) user identification field will be used as the token identifying the user to SIRA_PRISE. The user ID you will be entering here must have been defined by the Web Client Administrator. He is responsible for defining all the user ID's that can validly log on to a WAAR-based application (such as this Web Client). The first time you log on using a newly assigned user ID, you will be required to change the password given to you by the Web Client Administrator. After that, you can always change to a new password by filling out the 'change password to' and 'confirm new password' fields.
It is possible to leave the userID (and password fields) blank. In that case, the web client will use anonymous transactions to communicate with the server. For more information about setting up the web client for secure use, please see the section on that topic.
The date and time formatting information is only relevant to the functions in the presentation layer package (the web client), and thus does not affect the operation of the SIRA_PRISE server in any way. For the user language, the only option currently supported is 'English'. After this information is accepted, you will be taken to the function chosen on the welcome screen.
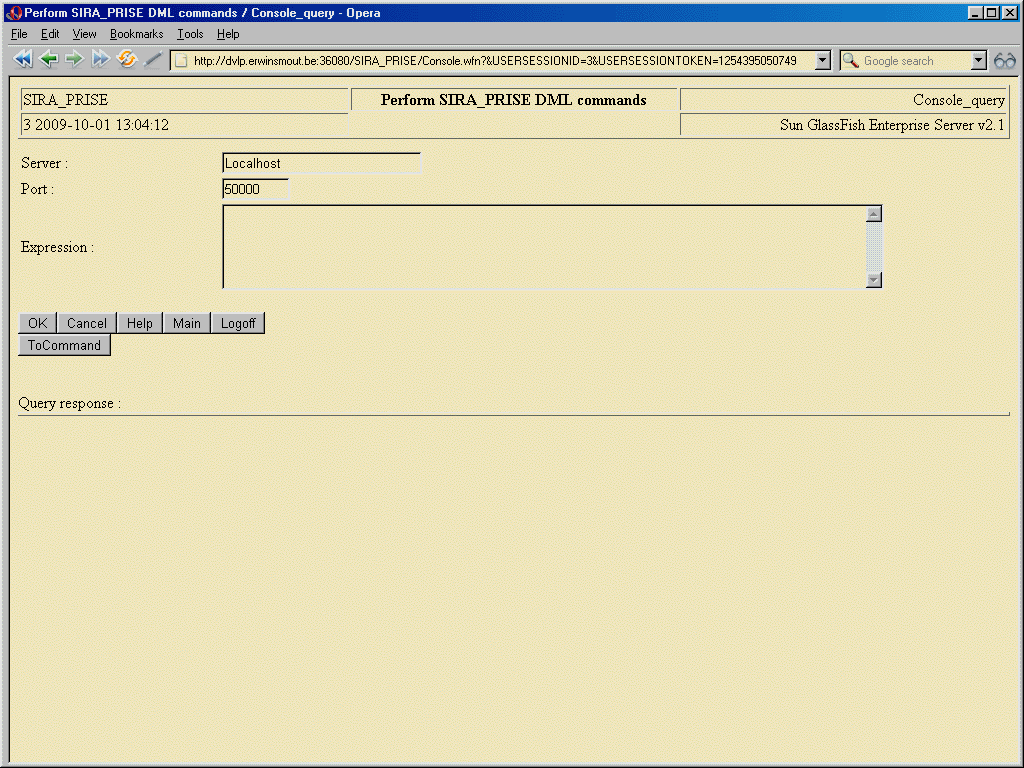
In the server field, you can enter the IP address or the DNS name of the SIRA_PRISE server on which you want to do an inquiry. Note that, as the connections to the database will be made from the machine where the Web Application Server is running, "Localhost" implies the machine where the web application server is running, not the machine that the user is working on.
In the port field, enter the IP port number on which the SIRA_PRISE server is listening for incoming commands.
In the Expression field, enter the formula of the relational algebra you wish to have computed by the indicated server.
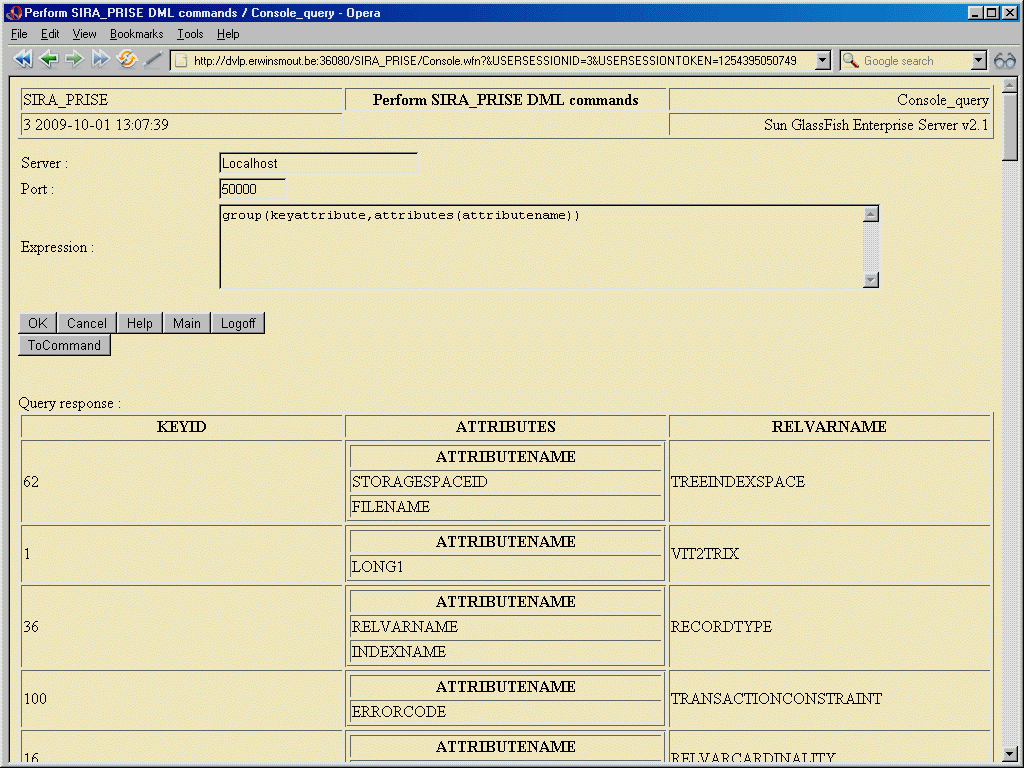
Hitting the "OK" button will try and execute the command on the server indicated and show the result under the "Query Response" heading :
Hitting the "ToCommand" button will take you to the update console. The layout of this screen is mostly similar to the query screen, with the following differences :
Performing queries from the command console requires that the keyword "INQUIRE" be typed before the expression to be queried.
If the command entered is an update command (an assignment command), then the result shown is not a relation in tabular form, but the textual response from the server instead. This may be a constraint violation message, or simply the empty string if the command was executed successfully.
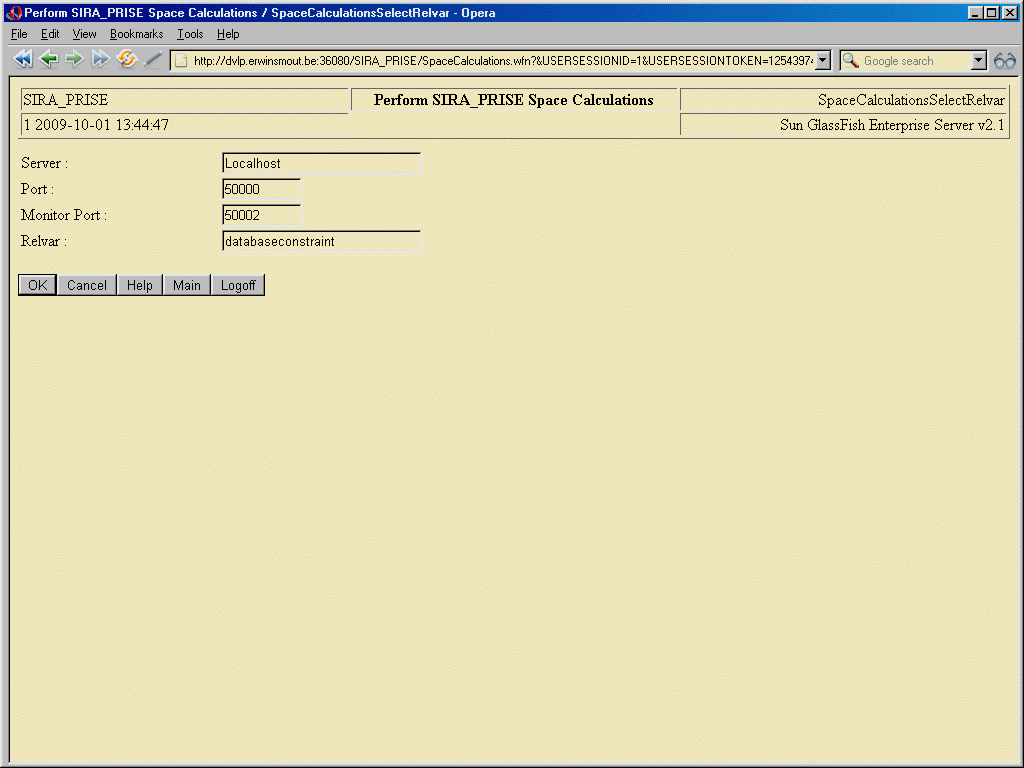
The space calculations function will first prompt you for a relvar name for which you want to perform space calculations :
Entering a valid relvar name and hitting OK will take you to the actual space calculations screen :
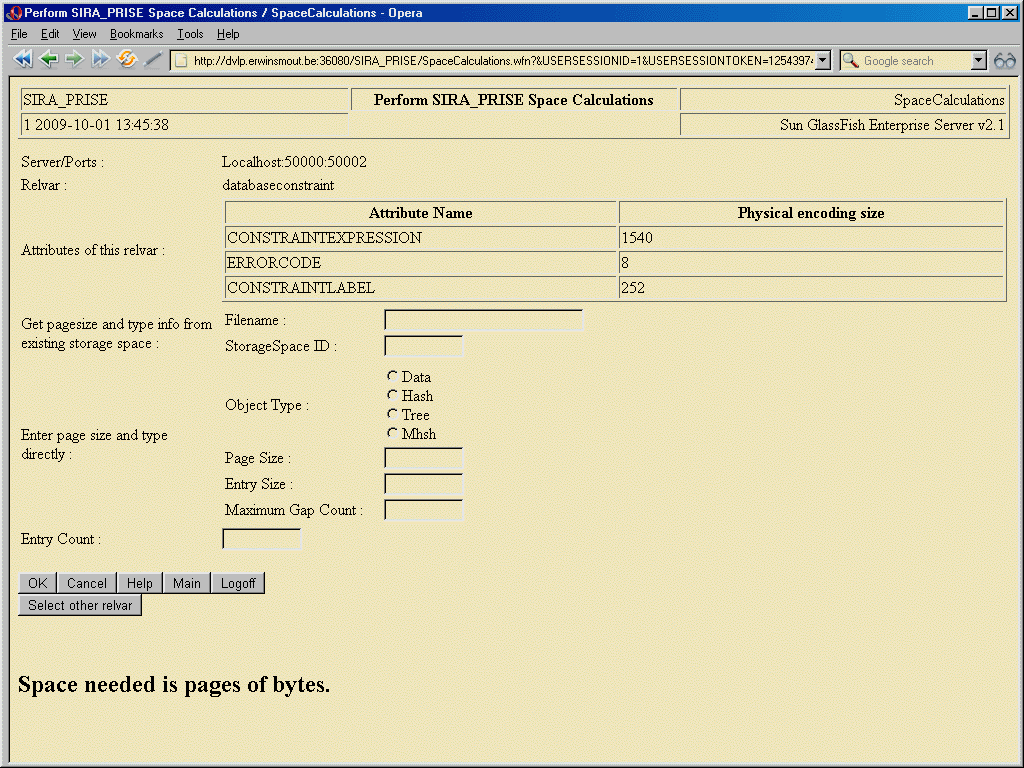
This screen displays the attributes of the relvar and the size in bytes required for their encoded values. This will allow you to compute the size in bytes of one single entry of a certain type you wish to create. E.g. if (in the given example) you wish to create an index on the attributes constraintexpression and errorcode, then the needed entry size in bytes will be 1540+8 = 1548 bytes.
In the lower half of the screen, enter the type of physical component you wish to create (data record, hash index, tree index or multiple hash index), the page size of the file where you want to record this physical component, the entry size you have computed from the given encoding sizes, and the estimated entry count (this is the estimated number of tuples that will need to be recorded). For data records and multiple hashingindexes, it is also required to enter the maximum gapcount that you envisage for the storage space's pages.
Hitting OK will then give you the number of required pages.
Hitting the 'Select other relvar' button will take you back to the Relvar selection window of this function without having to leave the function and log on again.
Verifying queries, i.e. having them "compiled" by the server and obtain some information about them, can be done using this function. The information to be entered is identical to that which must be entered in the Query Console function, but the response is different :
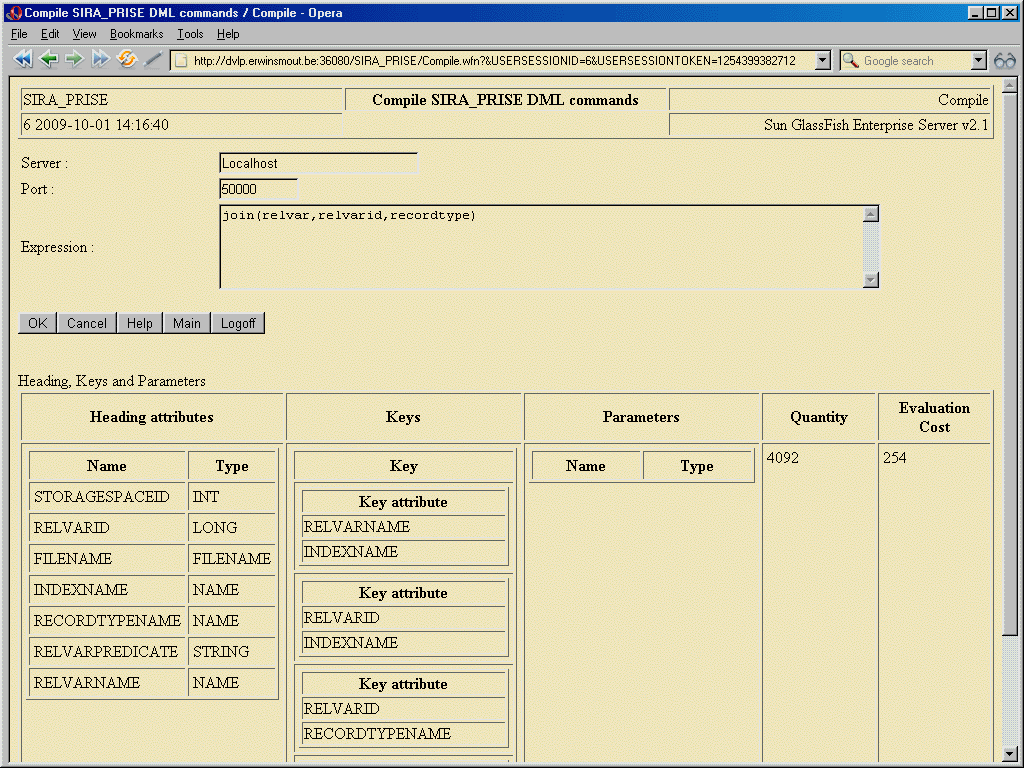
The information displayed is the heading of the relation that will be produced by the query given (or an error message indicating the reason why the query is invalid, of course). The 'Keys' column displays the keys of the resulting relational expression as they are determined by SIRA_PRISE's rules of key inference. The 'quantity' column gives an estimate of the expected cardinality of the result, based on the statistics known to the server, and the 'Evaluation Cost' column gives a measure for the "costliness" of executing the query, with lower numbers indicating "low-cost" queries. The information in the 'parameters' column is currently unused. The possibility to store compiled queries inside the SIRA_PRISE server, and have them executed repetitively using different values as parameters on each call, is not yet supported.
If you clicked "Database Administration" on the welcome screen, then after having entered your user information, you will first be prompted to identify the SIRA_PRISE server you wish to administer. This server will be remembered until you leave the Database Administration option and return to the welcome screen. It is not possible to perform administration tasks on different servers within the same session.
The server prompt screen looks like this :
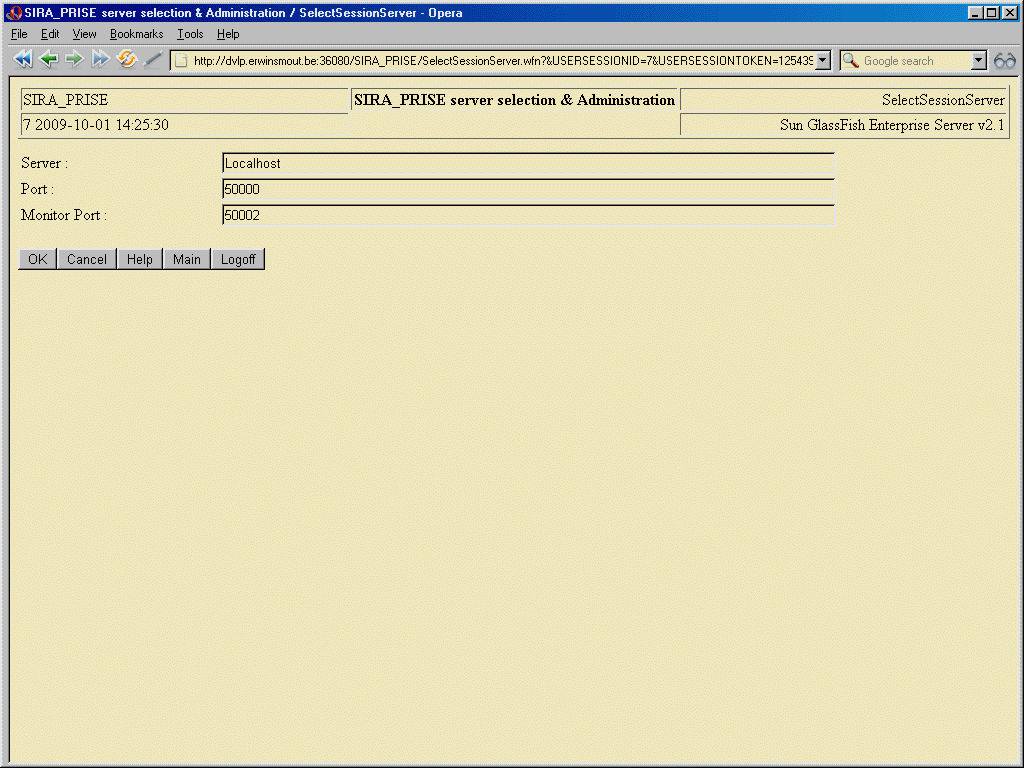
The different fields are pre-filled with default values, change these as appropriate and then hit "OK". The system tries to find a SIRA_PRISE server on the host and IP ports specified. If this is not succesfull, then an error message is shown, otherwise the Database Administration menu is shown :
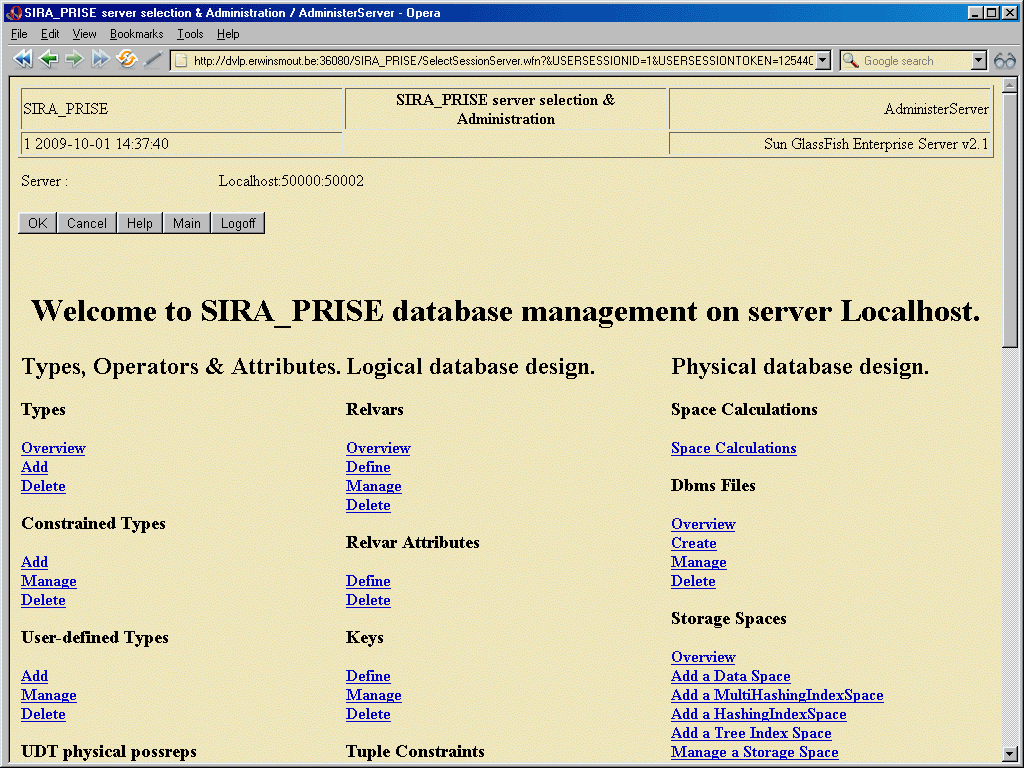
You can click the option for the administration function you wish to perform. All functions will be discussed one by one in the following sections.
When choosing a "manage" or "delete" function from the main menu, usually a selection screen will be presented allowing you to identify the database object (type, relvar, file, constraint, ...) you wish to manage/delete. Only after you've identified a unique object to manage/delete, will the actual screen be shown that will allow you to modify the details of the database object, or confirm the removal of the identified database object. Many of the screens also include links to other functions, and often the function linked to is a manage/delete function. When following such a link, the selection screen will be skipped if the link includes enough information to immediately identify the database object to be managed/deleted, and the manage/delete function linked to will immediately display the object details or the delete confirmation screen. This is true in general of all functions described here, and will not be repeated in each section.
The selection screens are mostly straightforward, and will not be illustrated in this guide. The same holds for the delete confirmation screens, as those generally consist only of a section that displays some detail, plus the needed OK/Cancel buttons to give the user the option to continue or abort the deletion. With the odd exception here and there, the same also holds for the "manage details" windows, which will mostly be as good as identical to the corresponding "Create ..." window. Unless there are significant enough differences to be stressed between the "manage details" and "create" windows for the same object type, the "manage details" windows will not be explicitly illustrated here either.
Many of the selection windows and overview windows include a "name pattern" field. These fields allow you to restrict an overview to only the objects of the concerned type (relvar, constraint, attribute, file, ...) whose name matches the specified pattern. Where applicable, such selections employ SIRA_PRISE's MATCHES operator. This means that the patterns you can enter are identical to java's Regex Patterns. Explaining the full functionality of these is beyond the scope of this document, so for precise details we refer to the java documentation. The most interesting possibilities for use are the following :
This function can be used to produce an overview of all known types.
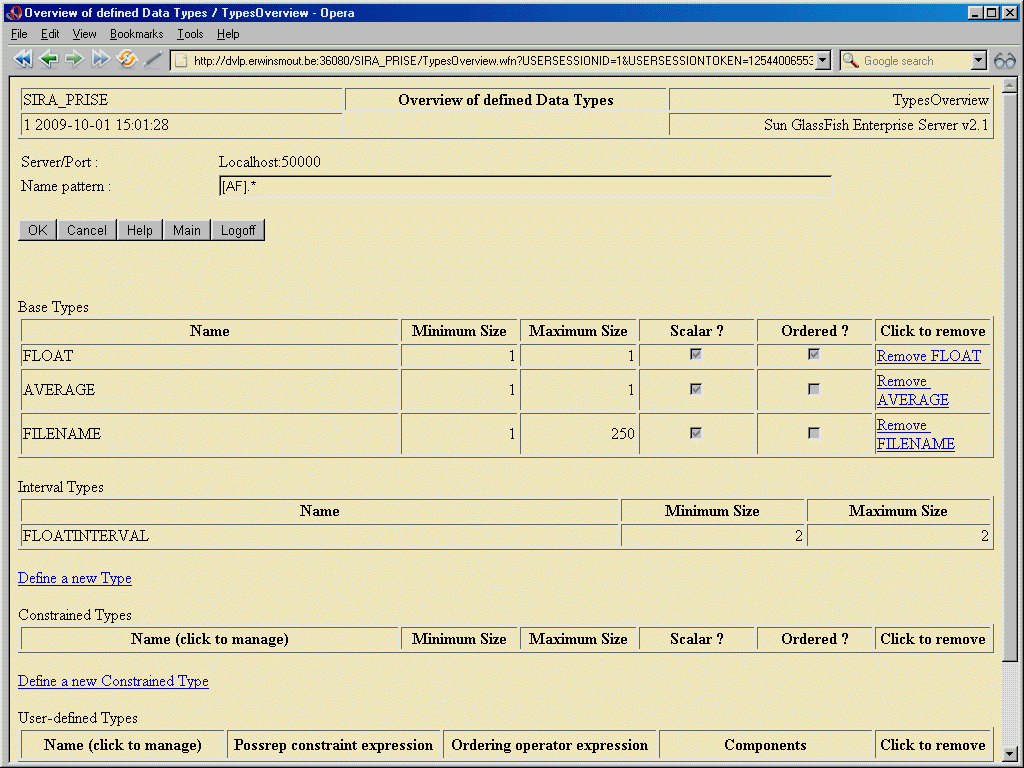
The "Types Overview" function displays an overview of all available types. The page is divided in four distinct sections, one mentioning all the "base" (i.e. java-implemented) types, another mentioning all the interval types, a third listing all the "constrained" types, and finally a fourth section listing all the "user-defined" types (i.e. all the types that are defined via a user declaration in the catalog, and are not backed by a java implementation).
For the base types, links are available to remove the type from the system ("Delete types" function) or to define a new one ("Create types" function), and for the constrained and user-defined types links are available to define a new one ("Create Constrained Type"/"Create User-defined Type" ), to modify the details of an existing one ("Manage Constrained Type"/"Manage User-defined Type" ), and to remove it from the system ("Delete Constrained Type"/"Delete User-defined Type").This function allows to register a new type to a SIRA_PRISE server. Please observe that for installing a new such type in SIRA_PRISE, an implementation class must be available as described in the User and Installation Guide.
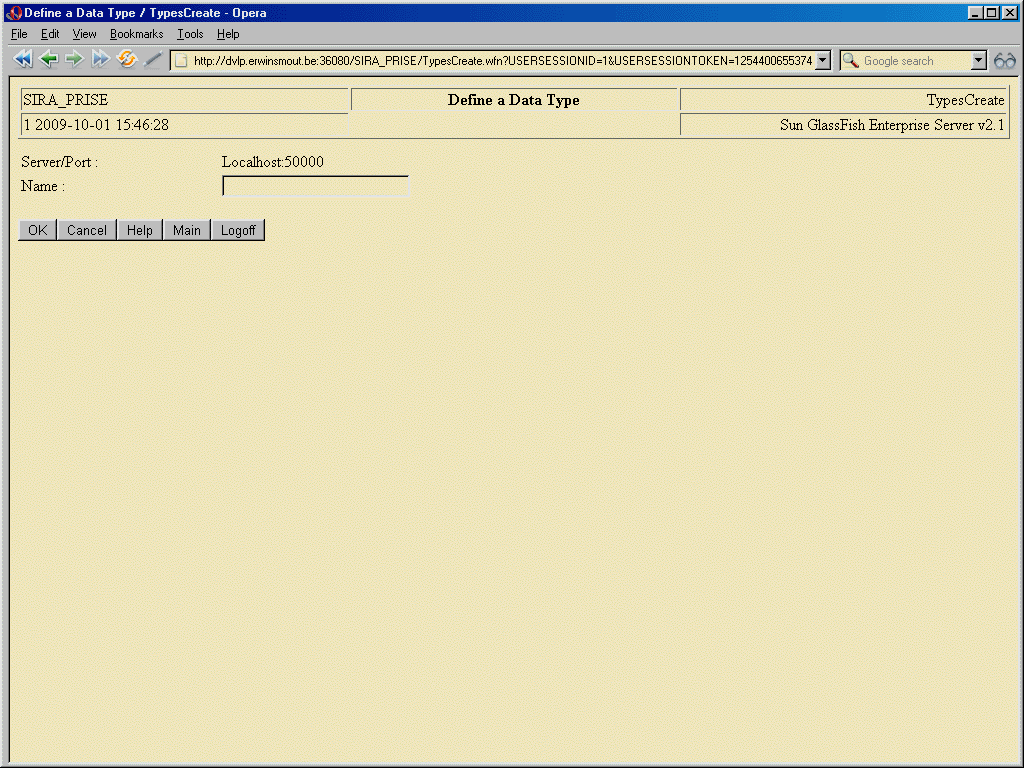
Only the type name must be entered, hitting OK will register the type in the server.
Currently, there is nothing that can be managed about base types, since all the details are hardcoded in the java implementation. The only operations available for administering java-implemented types known to SIRA_PRISE, are adding them and deleting them.
Note that while it is technically possible to replace the java implementation object with different/newer versions (and there is little that SIRA_PRISE can do to prevent this from happening), it is strongly advised not to do this, as such operations always come with a risk of corrupting your existing database.
For managing the details of Constrained Types, please see under "Manage Constrained Type".
This function can be used to
remove a java type from SIRA_PRISE's type
system.
This function allows to define a new "Constrained Type" :
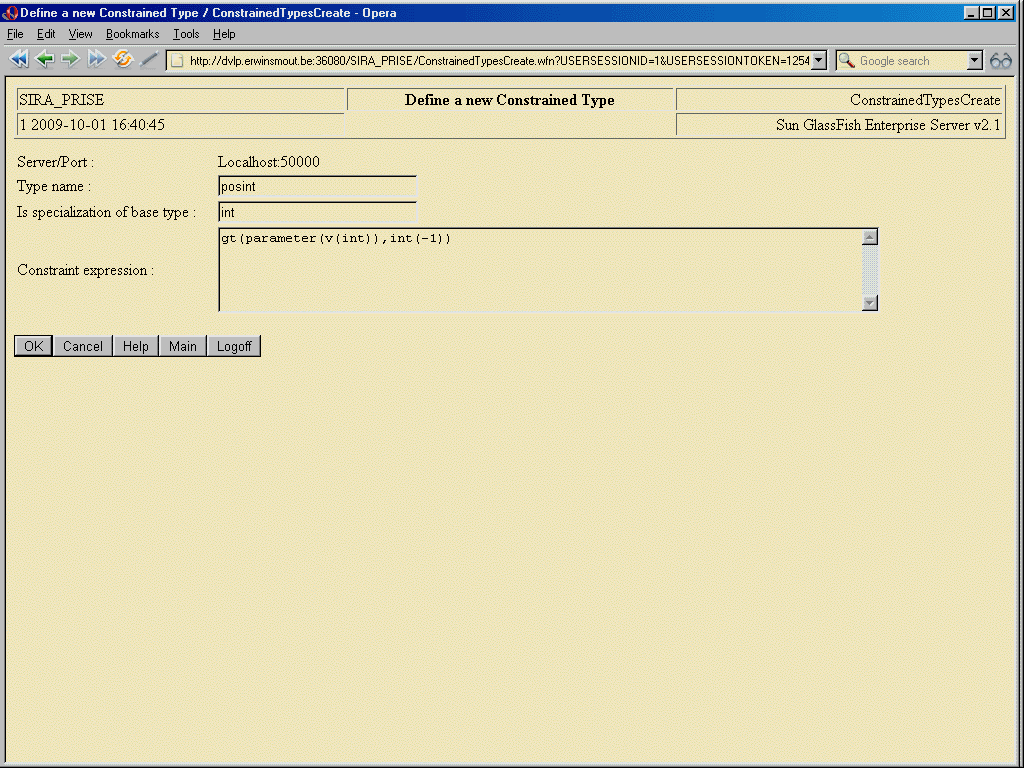
The base type that the constrained type is a specialization of, must be a java-implemented type, an interval type, or a user-defined type. SIRA_PRISE currently does not support Constrained types that are themselves based on another constrained type.
The constraint expression must be a boolean expression that includes exactly one parameter, which must be denoted as 'parameter(v(...))', with the ellipsis replaced by the actual base type name. If the expression, when evaluated for a certain given value of the base type, yields "true", then that value is also a value of the constrained type, otherwise, that value is not also a value of the constrained type.
This function allows to modify the details of an existing constrained type. Please observe that the type can only be changed if there are no attributes of this type, or of any type that depends on this type for its definition, in recorded relvars.
No special remarks apply.
This function allows to define a new "User-defined Type" :
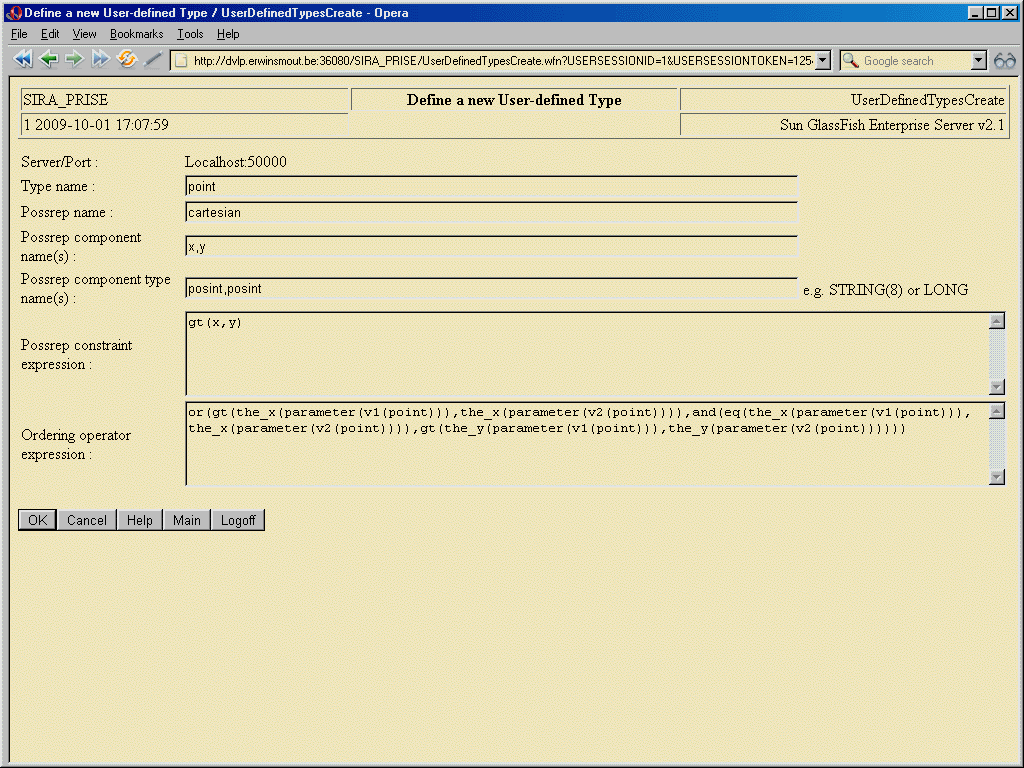
Some points to be noted :
STRING(8).THE_X(PARAMETER(V(POINT)))".
Note that this alternative isn't even considered valid and
that the only available way to define a possrep constraint expression,
is through the shorthand.THE_X(PARAMETER(Vn(POINT)))",
where 'Vn' is either 'V1' or 'V2' (and 'X' is to be replaced with the
appropriate component name, of course).This function allows to modify the details of an existing User-defined type. Please observe that the type can only be changed if there are no attributes of this type, or any type that is in any way based on it, in recorded relvars. This includes the creation, alteration or removal of the ordering operator definition (imagine that a tree-index has already been built on values of the user-defined type, or that interval values of this user-defined type have already been recorded. All those might be rendered corrupt by some modification of the ordering that was in place before).
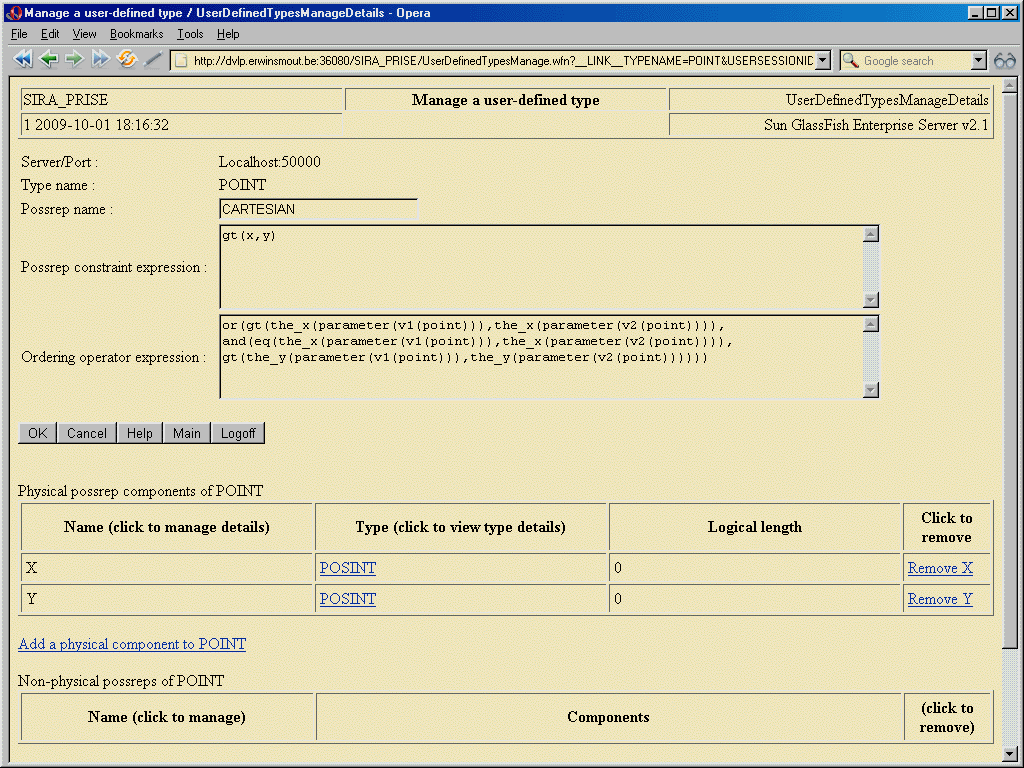
Points to note :
No special remarks apply.
This function allows to define a new component for the physical possrep of a User-defined Type. Note that using this function constitutes a change to the overall definition of the concerned User-defined Type, and that it is therefore subject to the same conditions/restrictions that also apply to modifying User-defined Types : namely that there cannot be any attribute of this type, or of any type that in any way depends on this type for its definition, in any recorded relvar.
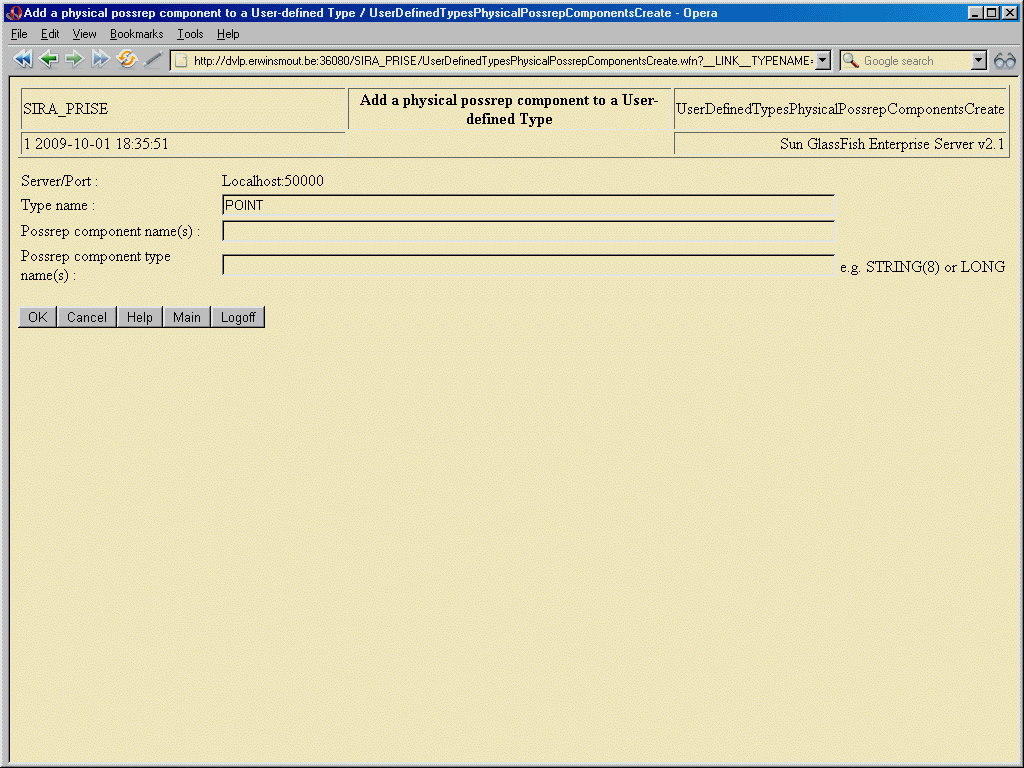
Some points to be noted :
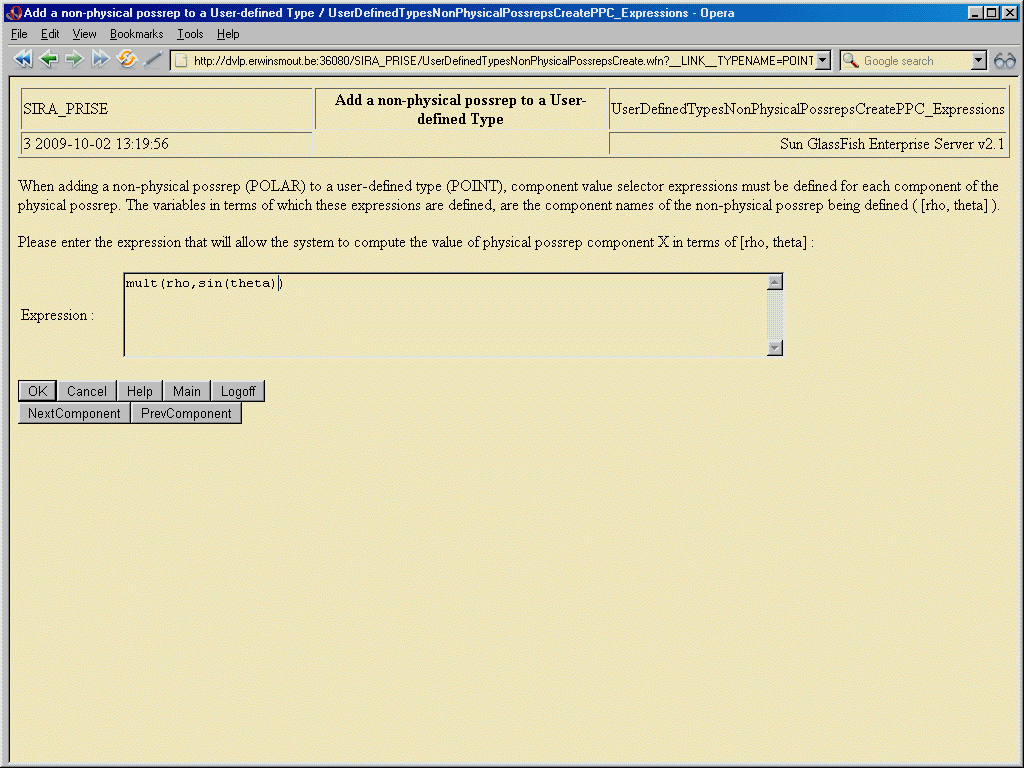
If any additional (non-physical) possreps are already defined for this type, then adding the new physical component will require addtional information. For each known non-physical possrep already known, a formula must be specified to compute the newly added physical possrep component's value from the components of the non-physical possrep. A window will be displayed prompting the user to specify this information for each required physical possrep component/non-physical possrep combination :
This function allows to remove a component from the physical possrep of a User-defined Type. Note that using this function constitutes a change to the overall definition of the concerned User-defined Type, and that it is therefore subject to the same conditions/restrictions that also apply to modifying User-defined Types : namely that there cannot be any attribute of this type, or of any type that in any way depends on this type for its definition, in any recorded relvar.
This function allows to create additional (non-physical) possreps for a user-defined type. Note that using this function does not constitute a change to the overall definition of the concerned User-defined Type, and that it is therefore not subject to the conditions that there cannot be any attribute of this type, or of any type that in any way depends on this type for its definition, in any recorded relvar.
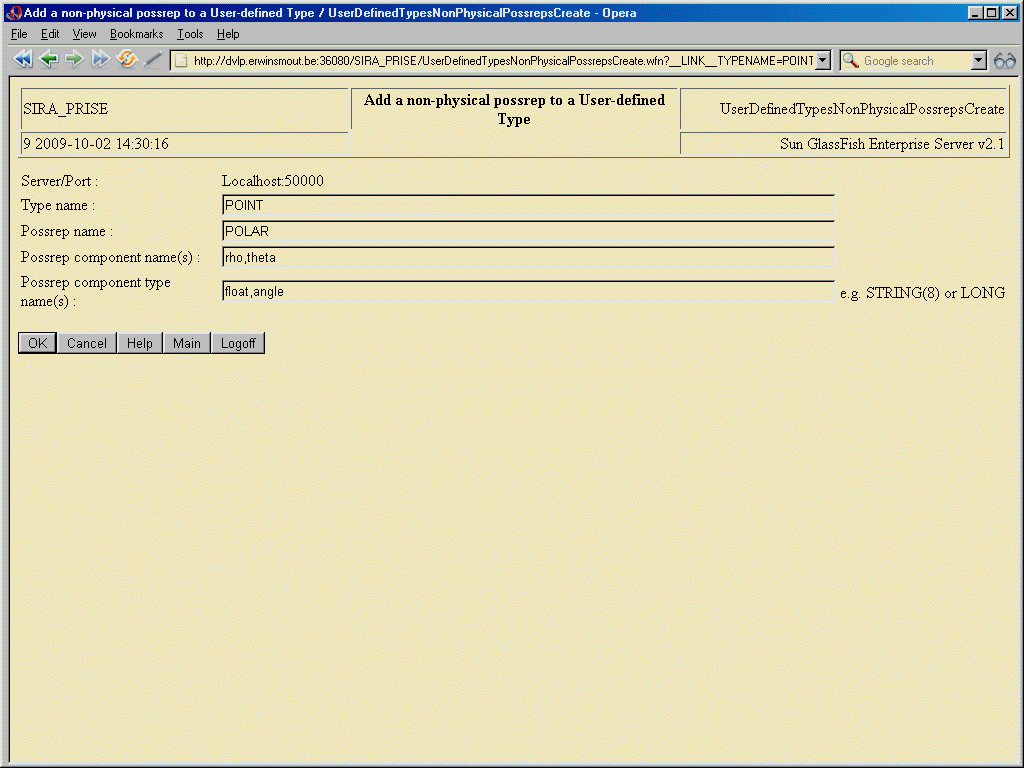
Some points to be noted :
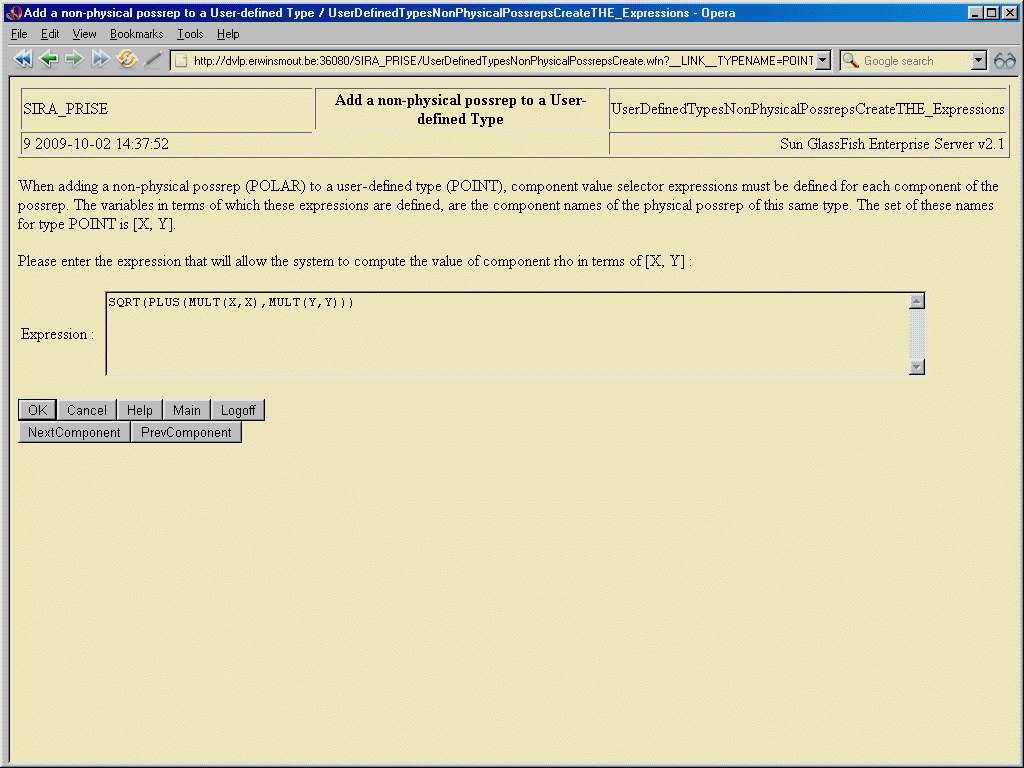
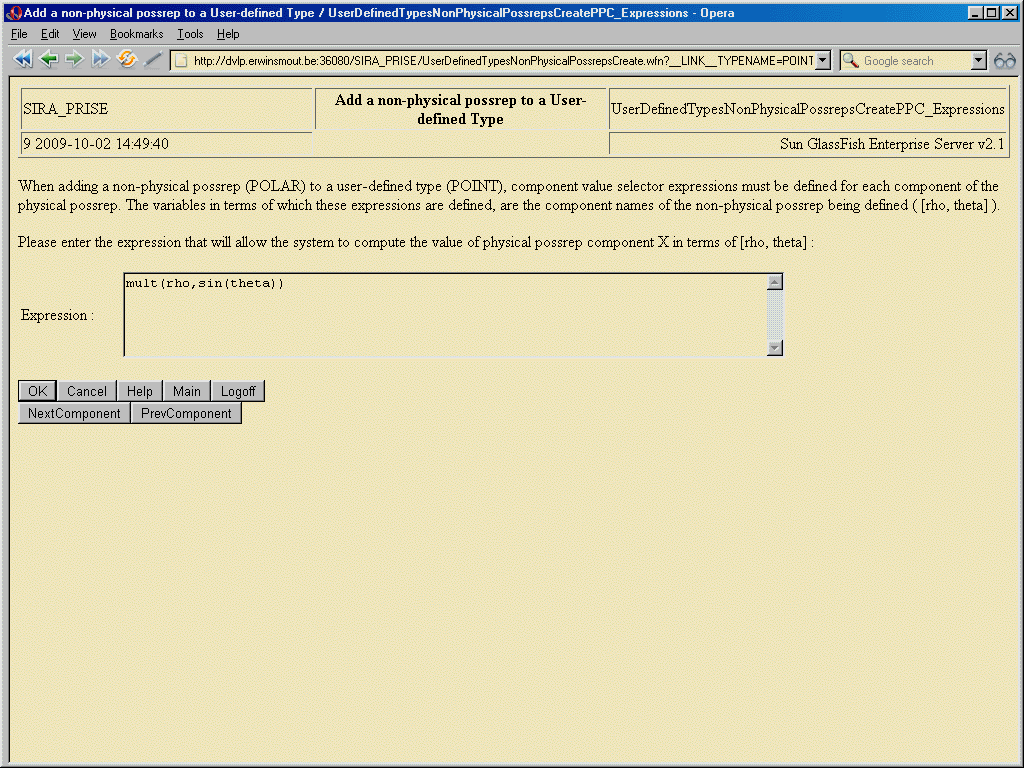
Two sets of additional information will be required before the addition of the non-physical possrep can be effectuated :
Windows will be shown prompting the user to provide this information :
This function has not yet been implemented.
This function allows to delete non-physical possreps defined for a user-defined type. Note that using this function does not constitute a change to the overall definition of the concerned User-defined Type, and that it is therefore not subject to the conditions that there cannot be any attribute of this type, or of any type that in any way depends on this type for its definition, in any recorded relvar.
This function will also delete the definitions for any THE_ expressions and physical possrep component value selectors that correspond to the non-physical possrep being deleted.
This function can be used to produce an overview of all known attributes that satisfy certain criteria :
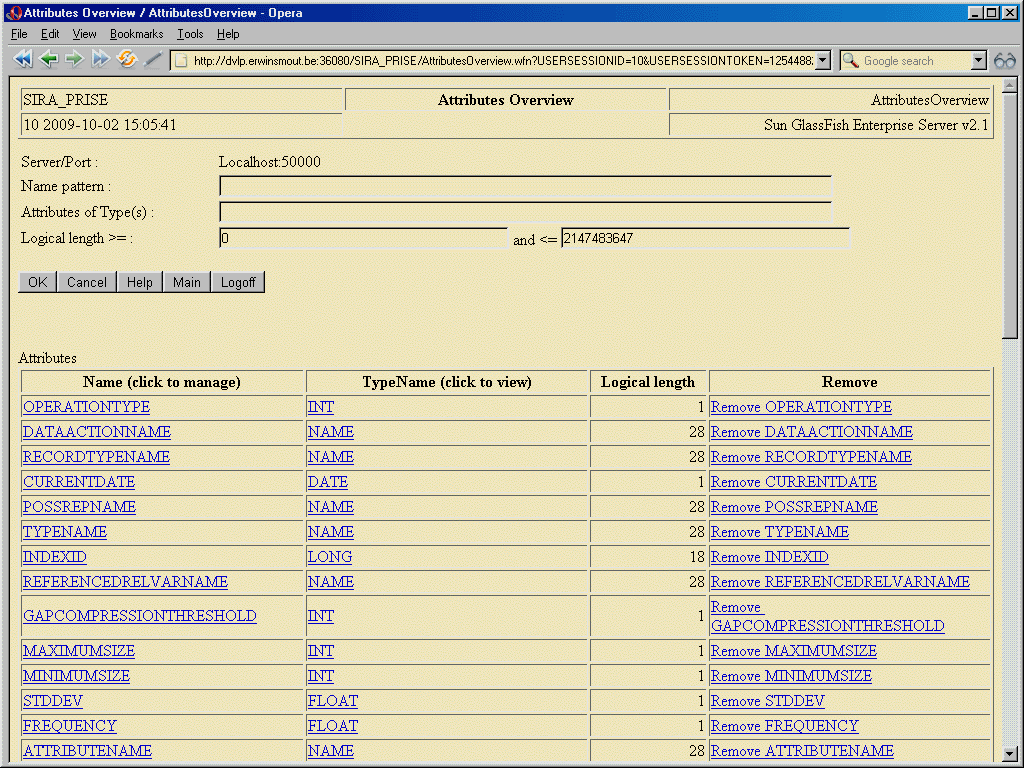
After having clicked OK, the list will be displayed including links to change details of the attribute definition ("Manage Attributes" function), view its type definition ("Manage Type" function), remove the attribute ("Delete Attribute" function), or add a new attribute ("Create Attribute" function).
This function can be used to define new attributes :
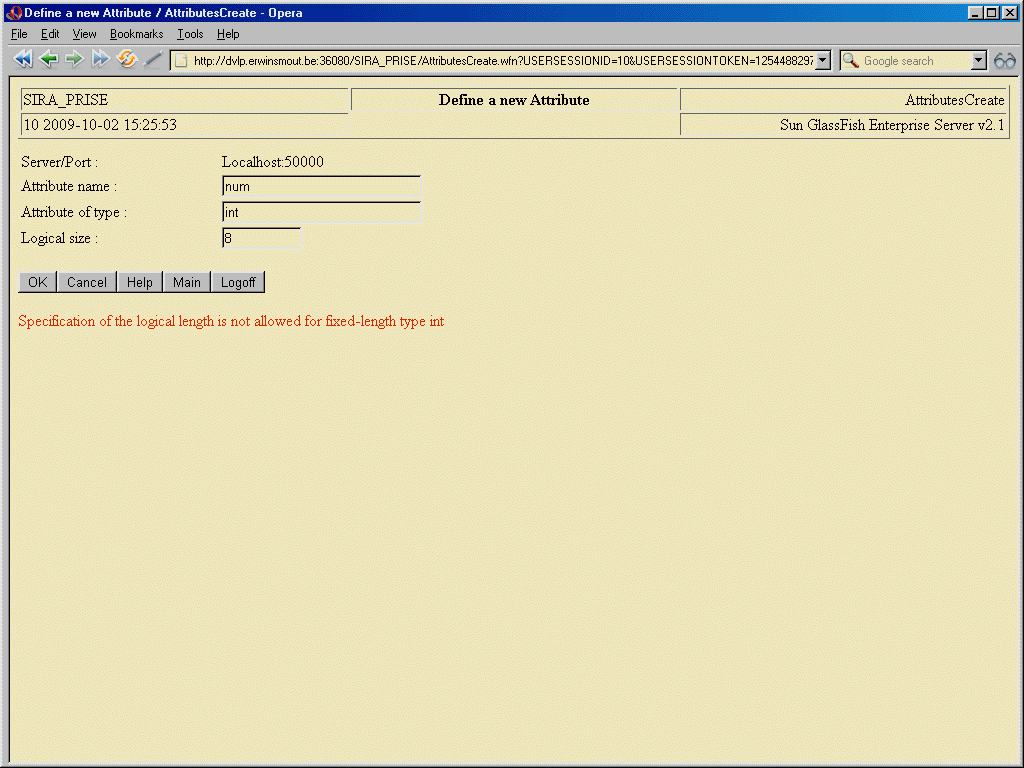
The name of the attribute and its type must be entered here. If the type is defined as a fixed-length type, then the "logical size" field must be left blank. If the type is defined as a variable-length type, then the "logical size" must be entered, and the length provided must be within the range defined by the type.
This function allows to modify the details of an attribute :
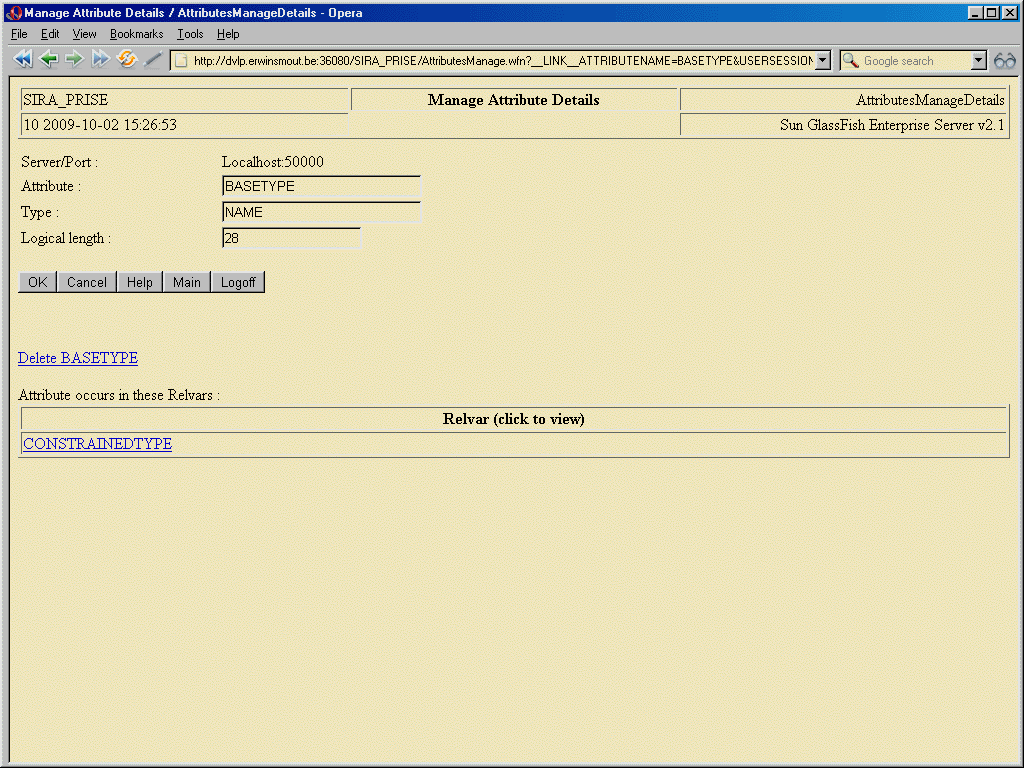
As the example demonstrates, the "Manage Attributes" function also displays a list of all relvars in which the displayed attribute participates, including a link to invoke the "Manage Relvar" function for that relvar.
For the logical length, obviously the same rules apply as when defining a new attribute.
No special remarks apply.
"Overview of defined relation variables" allows you to inquire and display which relvars are known to the server you are administering. First of all, a screen is shown allowing you to enter some selection criteria. The "recorded in" criterion selects all and just those relvars which are recorded either in a specific or else in any dataspace in a dbms file. Hitting "OK" will show the results as follows :
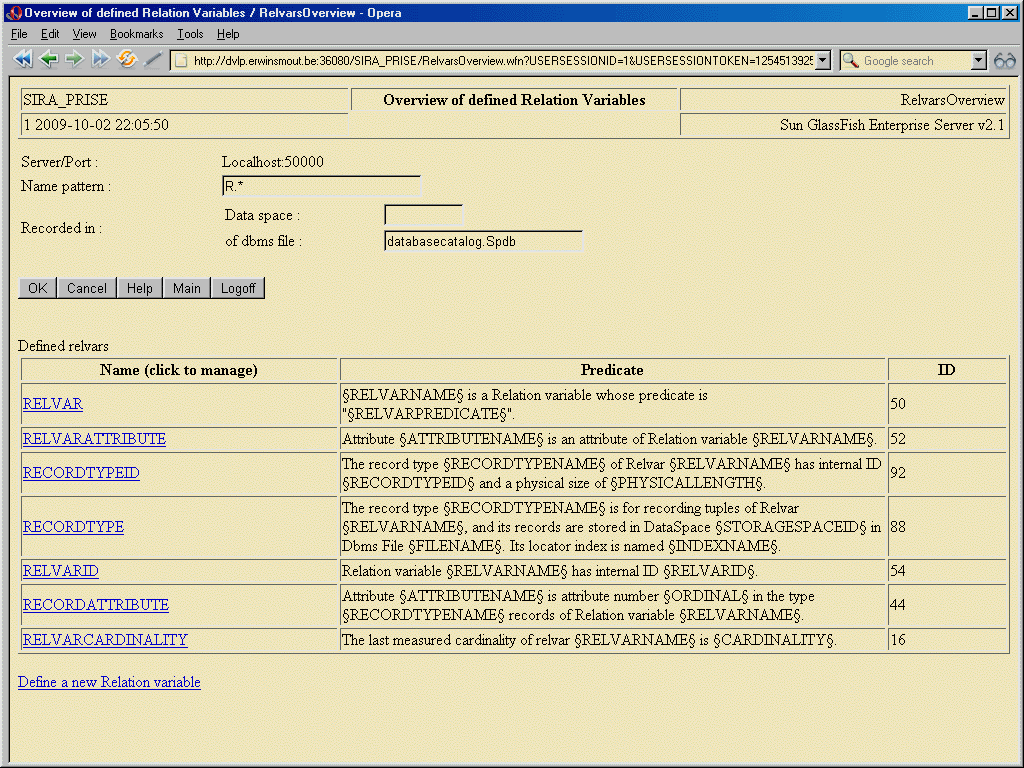
For each known relvar satisfying the selection criteria entered, that relvar's name, predicate and internal ID are displayed in tabular form.
Clicking on the relvar name will invoke the "Manage Relvar" function. Clicking on the "Define a new Relation variable" link below the table will invoke the "Create Relvar" function.
This function can be used to define a new Relation variable to a SIRA_PRISE server.
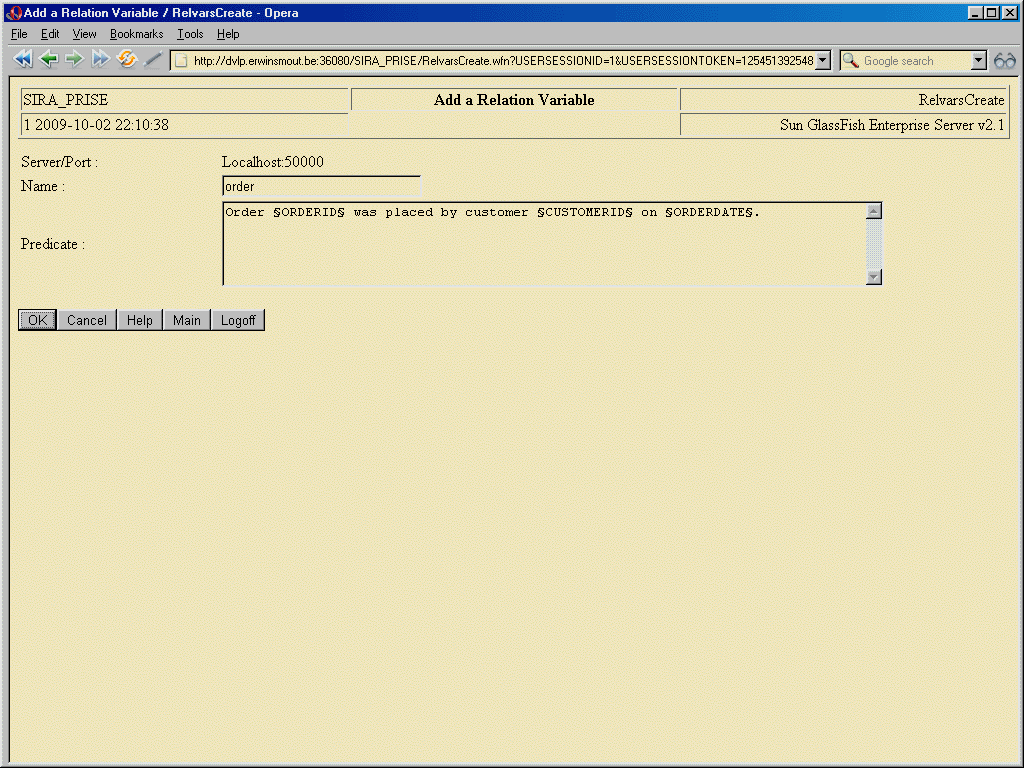
The relvar's name and predicate can be entered here. When added, the relvar will automatically be assigned an internal ID by the server.
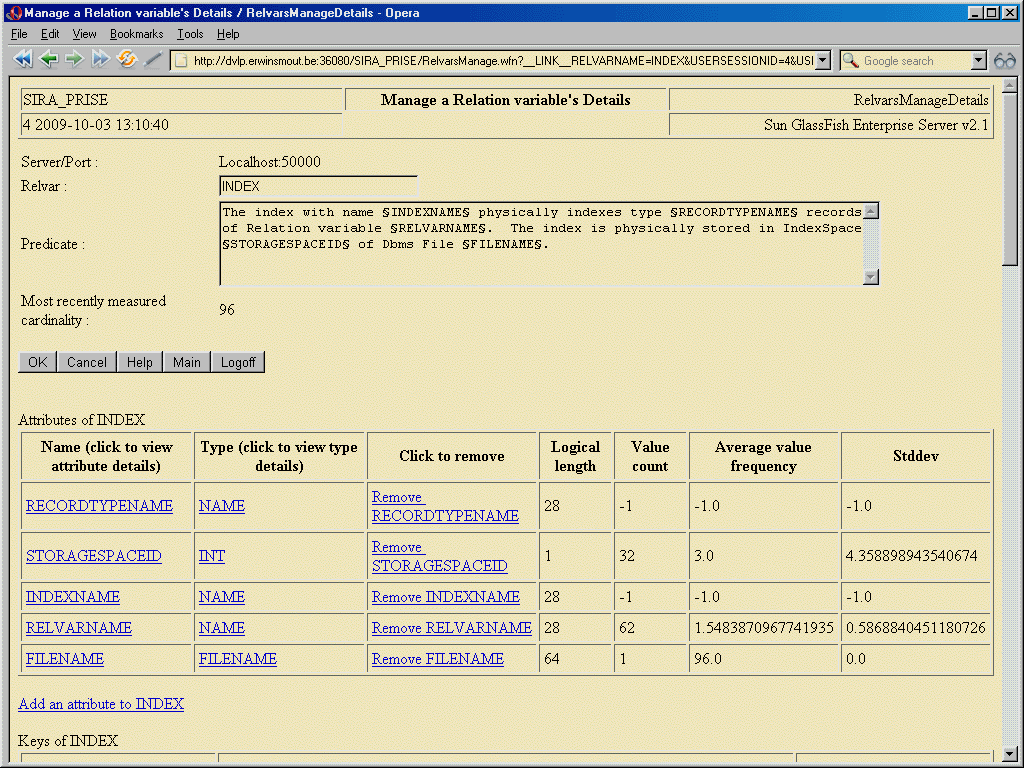
To modify the relvarname or the predicate text, change it and click OK. The remainder of the page shows all the relevant details of the relvar, plus a number of links, following which allows you to modify any of those details.
The table "Attributes of ..." mentions all the relvar attributes, their types, and any value distribution statistics that have been gathered for this attribute in this relvar. Clicking the attributename will take you to the "Manage Attributes" function. Clicking the typename will take you to the "Manage Type" function. Clicking the link "Remove ..." will take you to the "Delete Relvar Attribute" function. A value of -1 in the statistics columns means that no statistics are available. The link just below the table "Attributes of ..." will take you to the "Create Relvar Attribute" function.
The table "Keys of ..." mentions all the keys defined on this relvar plus the set of attributes that make up this key. Clicking the Key ID will take you to the "Manage Key details" function, and clicking the link "Remove key ..." will take you to the function "Delete Key".
The link just below this table will take you to the "Create Key" function.
The table "Tuple constraints defined on ..." mentions all the tuple constraints defined on the displayed relvar, plus links to add new tuple constraints ("Create Tuple Constraint" function), remove them ("Delete Tuple Constraint" function), or change them ("Manage Tuple Constraint" function).
The table "Transaction constraints on ..." mentions all the transaction constraints defined on the displayed relvar, plus links to add new ones ("Create Transaction Constraint" function), remove them ("Delete Transaction Constraint" function), or change them ("Manage Transaction Constraint" function). Note that Transaction Constraints have been deprecated and are preferably replaced with Assignment Constraints (see below).
The table "Assignment constraints defined on ..." mentions all the assignment constraints defined on the displayed relvar, plus links to add new assignment constraints ("Create Assignment Constraint" function), remove them ("Delete Assignment Constraint" function), or change them ("Manage Assignment Constraint" function).
Likewise, the table "Database constraints defined involving ..." displays all the defined database constraints in which the displayed relvar is mentioned, plus links to create, modify or delete them.
The table "Data actions triggered by updates to ..." displays the triggered data actions that will be executed when an update occurs to the displayed relvar. The available links allow you to go modify their details ("Manage Triggered Data Action"), create new ones ("Create Triggered Data Action"), or remove them ("Delete Triggered Data Action").
The table "Data actions triggering updates to ..." displays the triggered data actions that will cause updates to the displayed relvar as a consequence of some update to some other relvar. The available links allow you to go modify their details ("Manage Triggered Data Action"), or remove them ("Delete Triggered Data Action").
The table "Record types of ..." displays the record types that have been defined for this relvar. The available links allow you to invoke the "Manage Record Type" function, the "Create Record Type" function, or the "Delete Record Type" function.
The final link on the page allows you to delete the displayed relvar by switching to the "Delete Relvar" function.
The "Create Relvar Attributes" function allows you to add an attribute to an existing relvar :
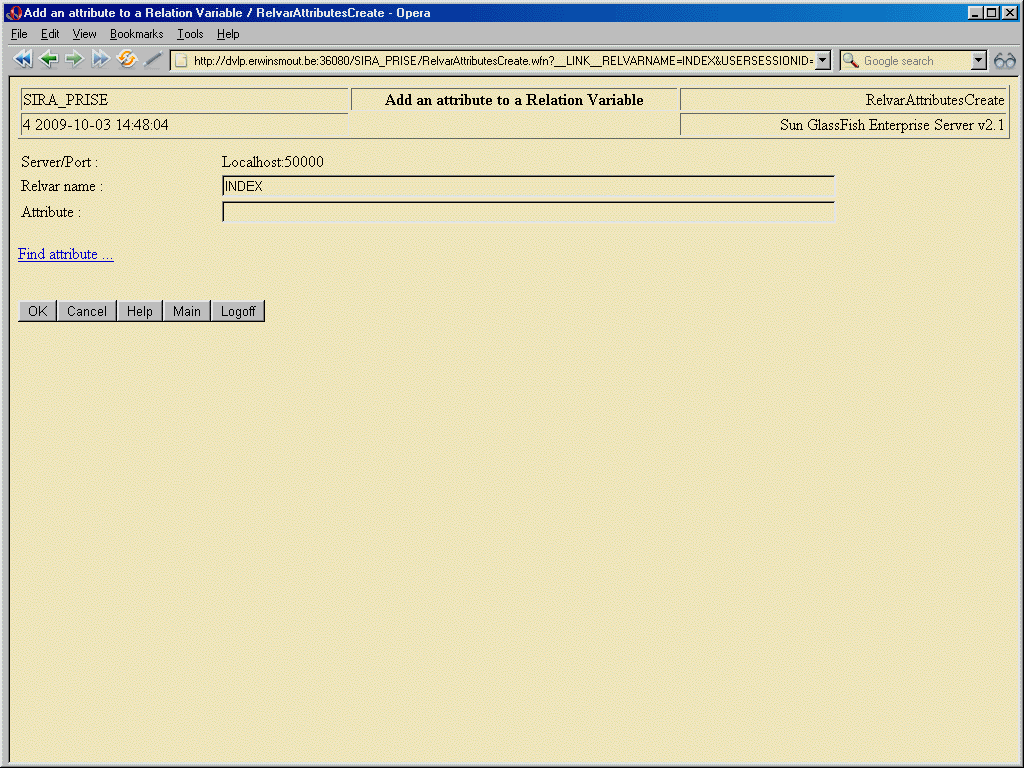
The link "Find Attribute ..." allows you to invoke the "Attributes Overview" function to find the precise name of the attribute you wish to add.
Hitting OK will add the attribute to the relvar. If, however, the relvar already is recorded (i.e it already has associated record types) , the system will first prompt you to specify the record type in which to add this attribute. To that effect, the system will display the following screen :
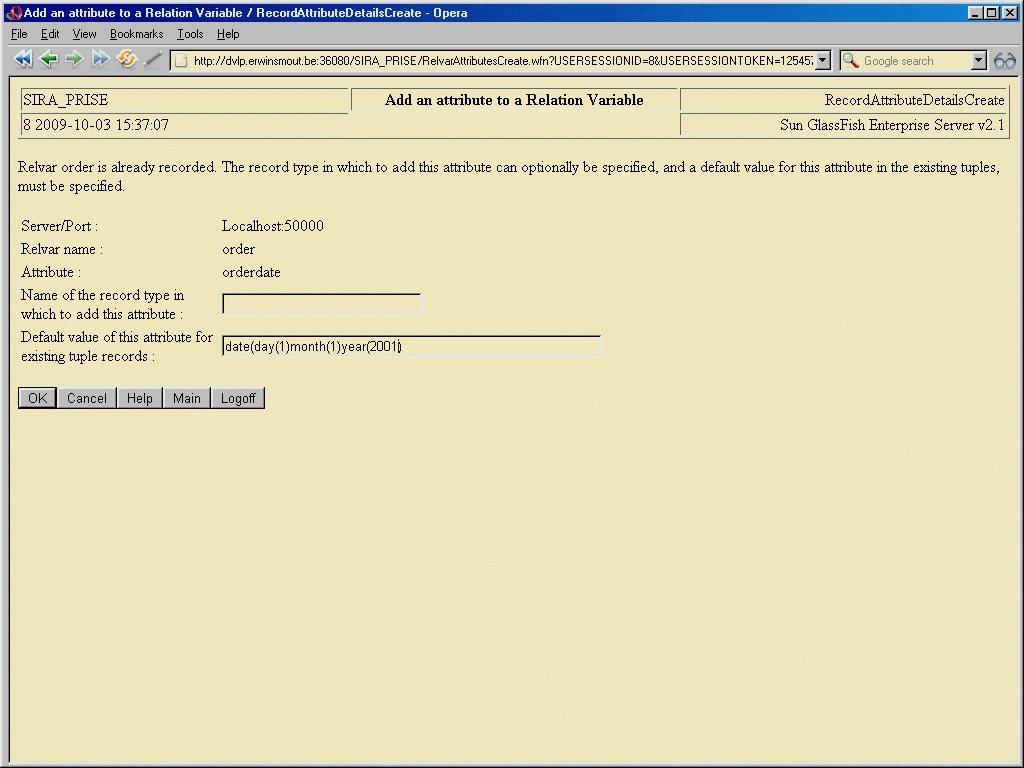
The "default value for existing tuple records" is provided for the case where a new attribute is added to a relvar, that already has recorded tuples, i.e. whose value is no longer the empty relation. The value provided here must obviously be a valid value of the new attribute's type (only literals are currenty supported here, arbitrary expressions of the required type are not yet supported in this context).
If a record type is specified to include the attribute in, then the records of the specified record type for existing tuples of this relvar will be extended so that they include the specified value for the new attribute. If no record type is specified, then the value will be recorded as resources located outside of any records (records in a dataspace, that is) for the relvar.
The "Create Key" function allows you to define a new key on an existing relvar, and to specify which attribute(s) will be part of that key :
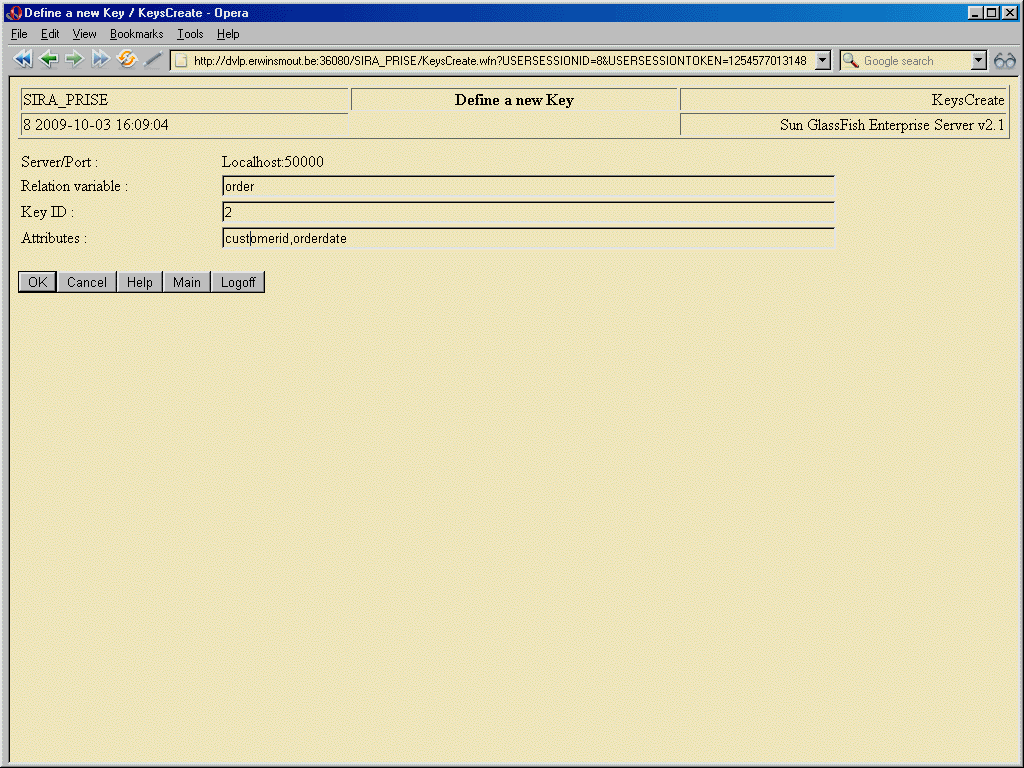
In the attributes field, a comma-separated list of valid attribute names can be entered.
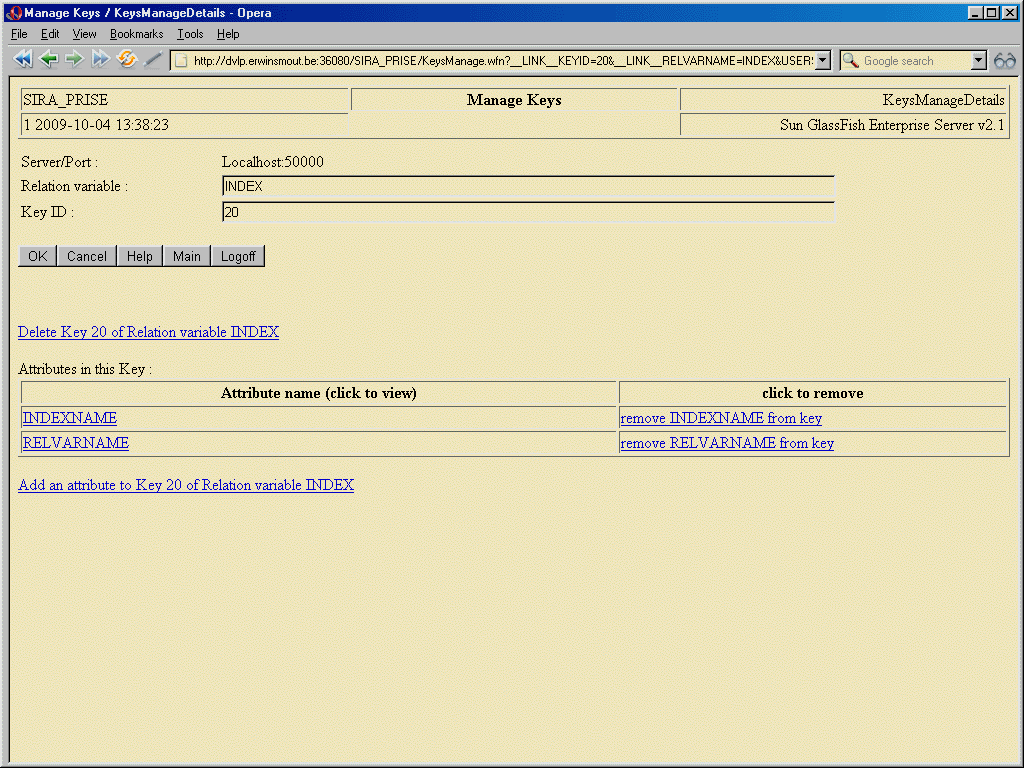
On this page, the Key Id for some existing key can be modified (if that seems useful to anyone).
The available links allow you to delete the displayed Key ("Delete Key" function), add an additional attribute to the key ("Add Key Attribute" function), remove an attribute from a Key definition ("Delete Key Attribute" function), and view the attribute details of a key attribute ("Manage Attributes" function).
No special remarks apply.
This function allows to add one or more attributes to an existing key on a relvar :
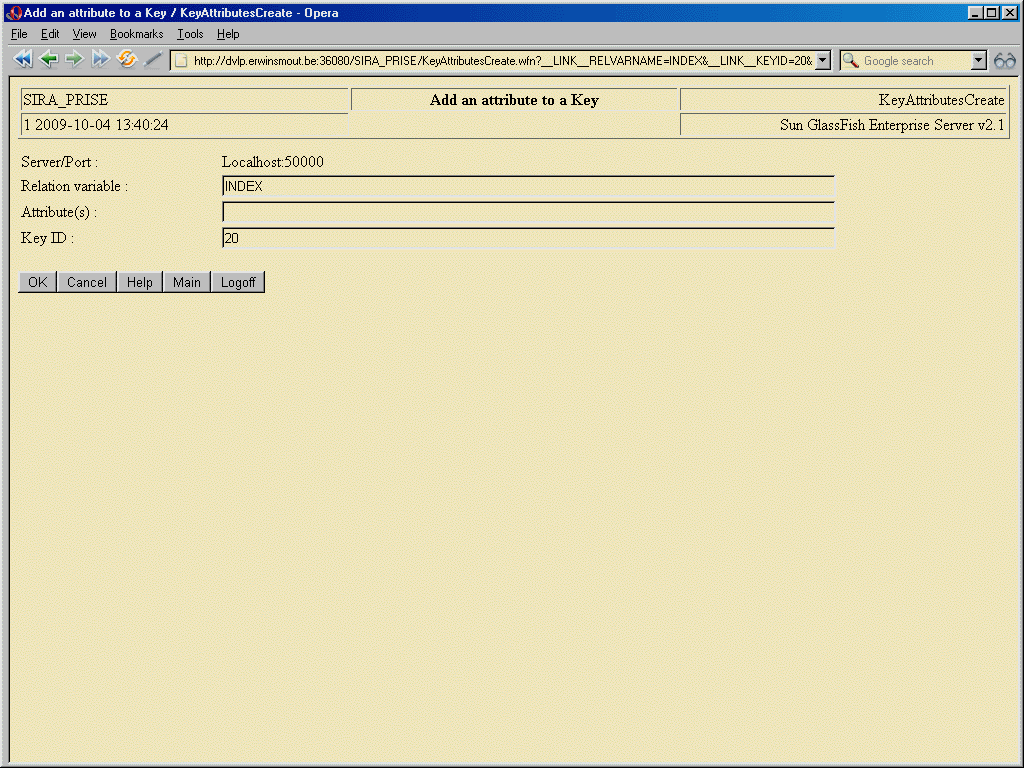
This function checks to see if the current value of the relvar satisfies the (stronger) constraint imposed by the 'reduced' key, and may therefore display error messages indicating such a problem.
"Overview of defined virtual relvars" allows you to inquire and display which virtual relvars ("views") are known to the server you are administering.
The name pattern field allows you to limit the displayed results to only those virtual relvars whose name matches the given pattern.
The "Referencing any of relvars" field allows you to limit the displayed results to only those virtual relvars whose definition involves a reference to any one of the given relvar names (multiple relvar names can be specified as a comma-separated list). Any relvar name included in the list can name either a virtual or a "real" relvar.
The "Include indirect references" field allows you to include in the results all the virtual relvars that do reference any of the relvars named in the "Referencing any of relvars" field, but do so only indirectly because the reference is through another virtual relvar that is itself not named in the "Referencing any of relvars" field.
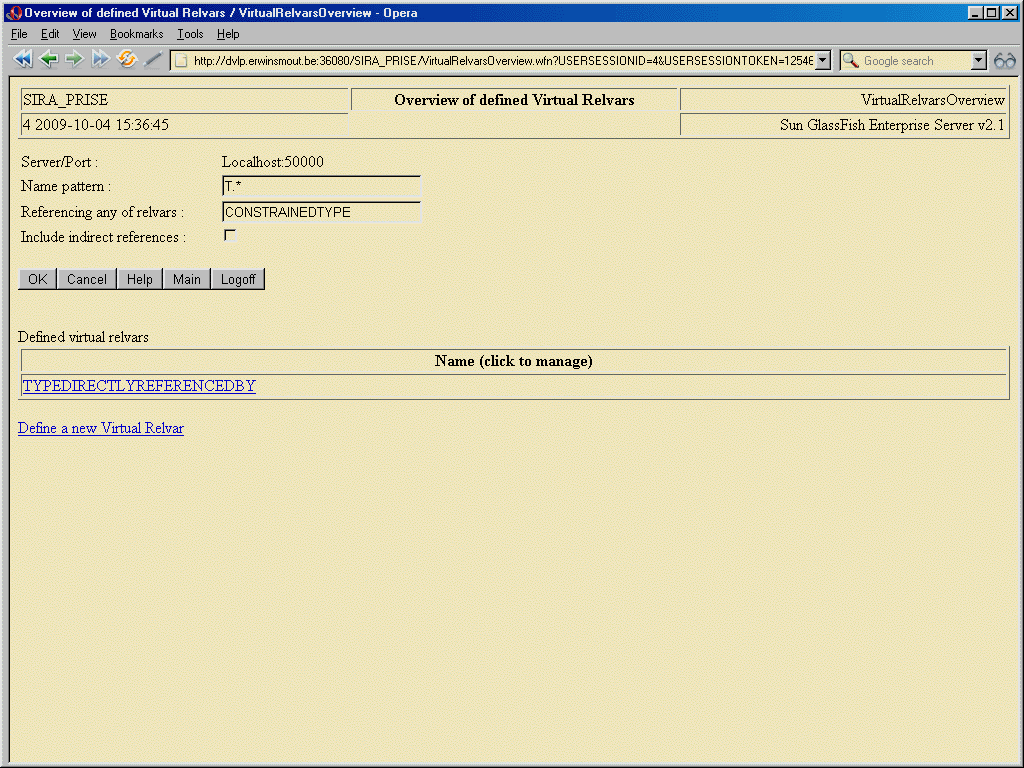
For each known virtual relvar satisfying the selection criteria entered, that relvar's name is displayed in tabular form.
Clicking on the relvar name will invoke the "Manage Virtual Relvar" function. Clicking on the "Define a new Virtual Relvar" link below the table will invoke the "Create Virtual Relvar" function.
This function allows to define new virtual relvars.
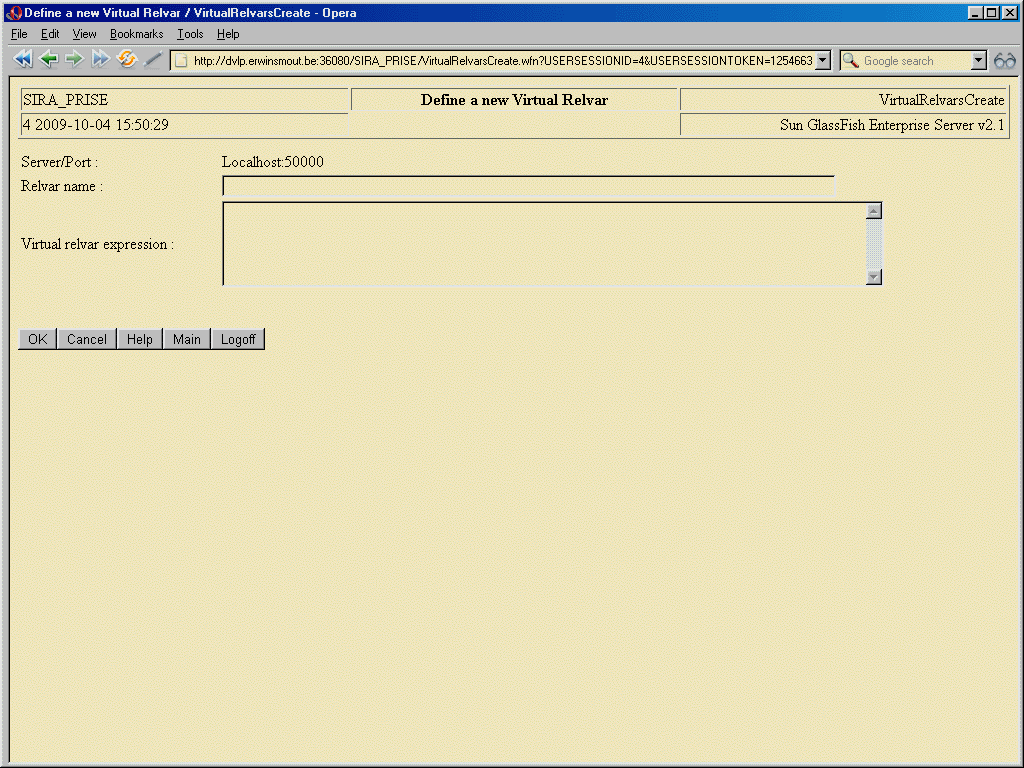
This function allows to modify the details of a virtual relvar definition.
Note that modifying a virtual relvar might render the definition of other virtual relvars invalid. This is not considered an error in all cases. The system may decide to just flag the other virtual relvar as 'invalid'. In that case, errors will only arise when the referencing virtual relvar (whose definition has become invalid) is itself referenced.
Note that deleting a virtual relvar will always be blocked as long as any other virtual relvar holds any reference to the virtual relvar to be deleted. Contrary to update, such referencing virtual relvars will never merely be flagged 'invalid'.
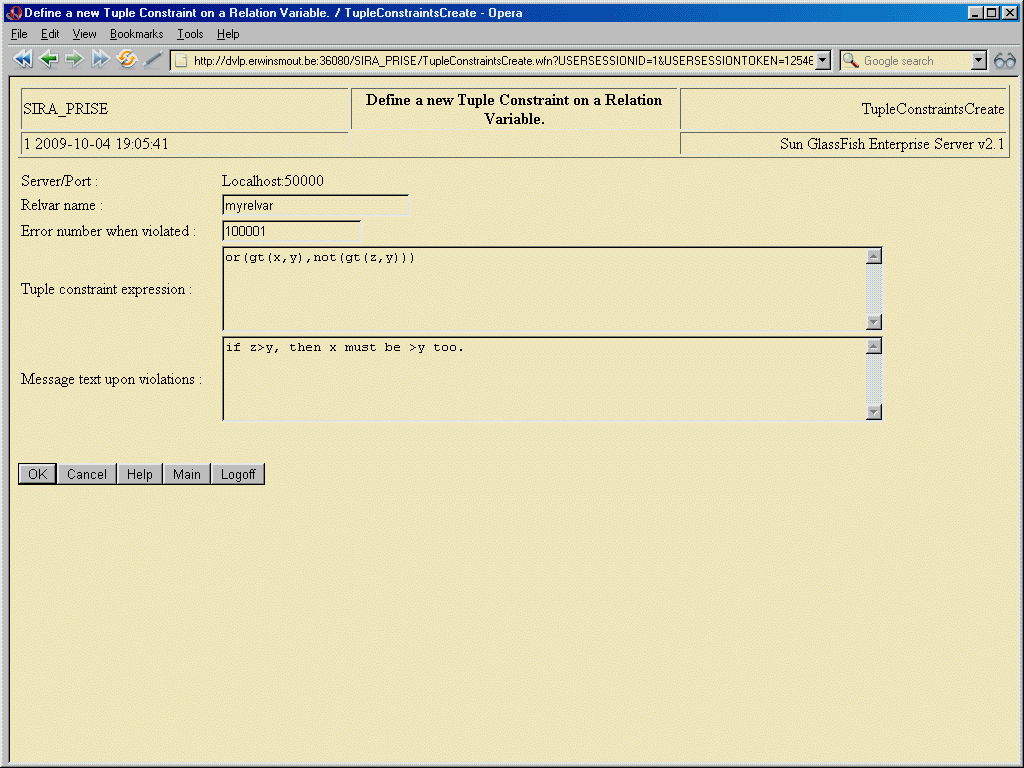
This function can be used to define new Tuple Constraints on a relvar and the corresponding constraint message text :
This function allows to modify the details of a Tuple Constraint defined on a relvar, and/or of the corresponding contraint message text :
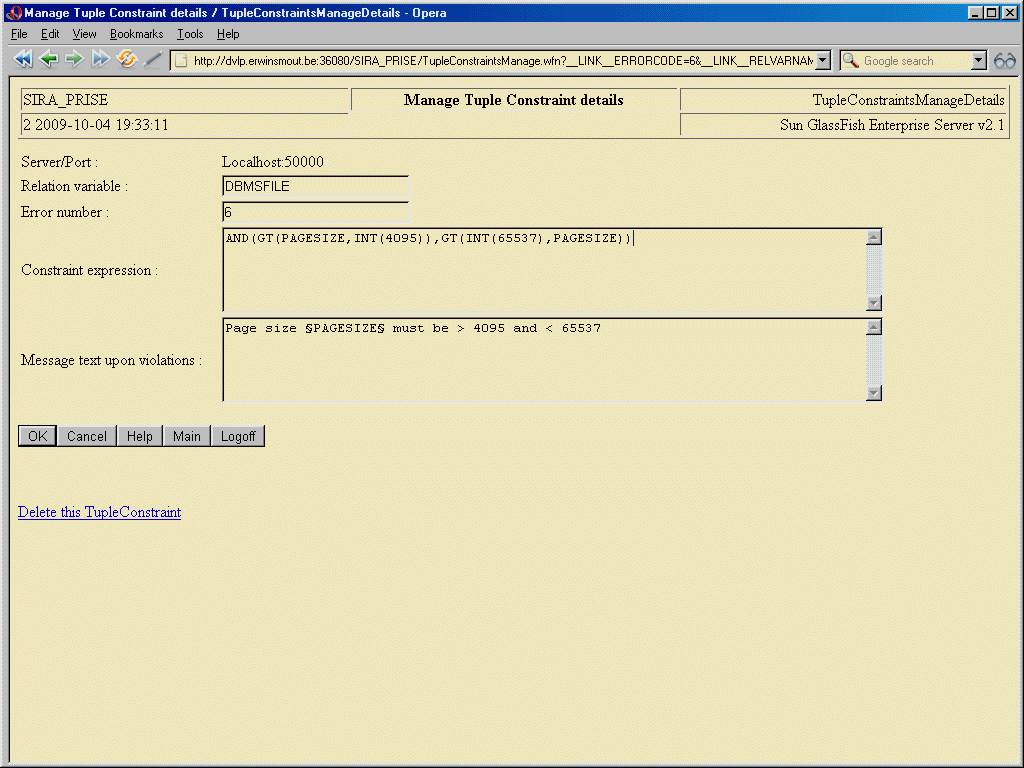
No particular remarks apply.
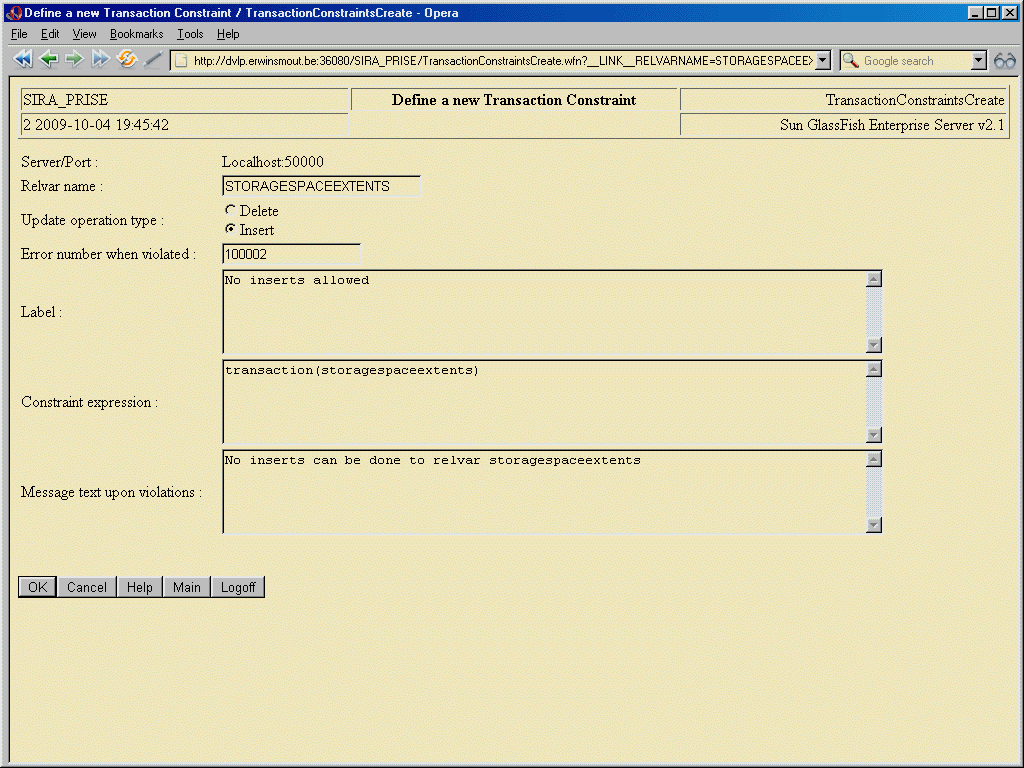
This function can be used to define new Transaction Constraint on a relvar. Note, however, that Transaction Constraints have been deprecated and are preferably replaced with Assignment Constraints, which can achieve exactly the same effect.
This function allows to modify the details of a Transaction Constraint defined on a relvar :
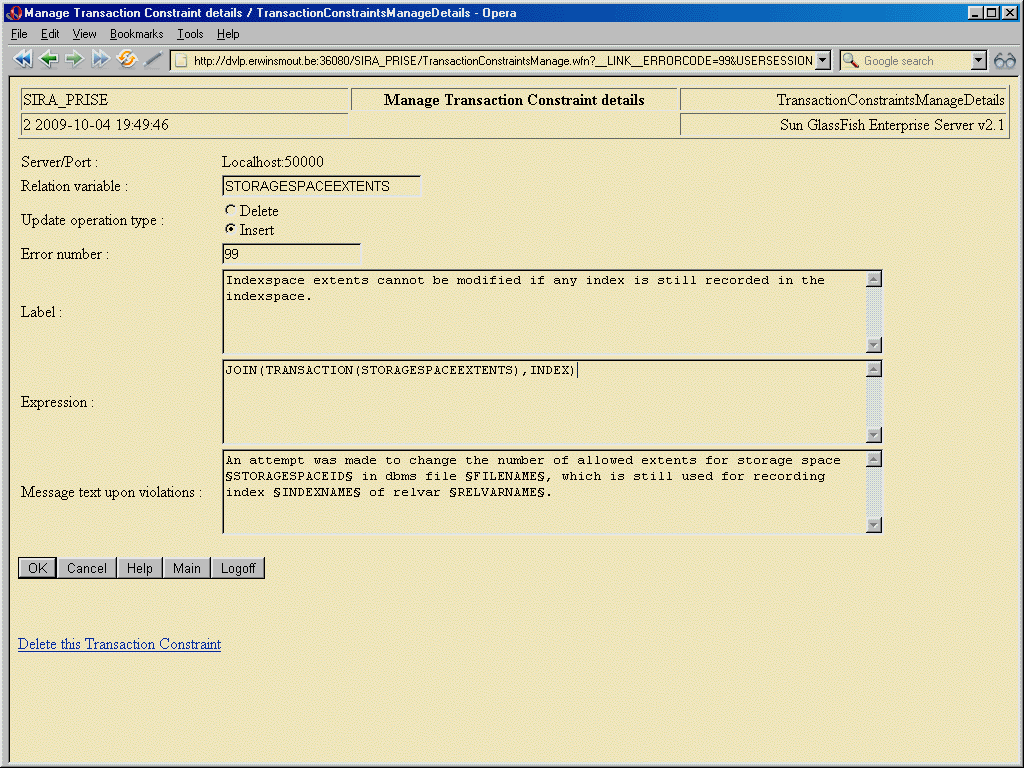
No particular remarks apply.
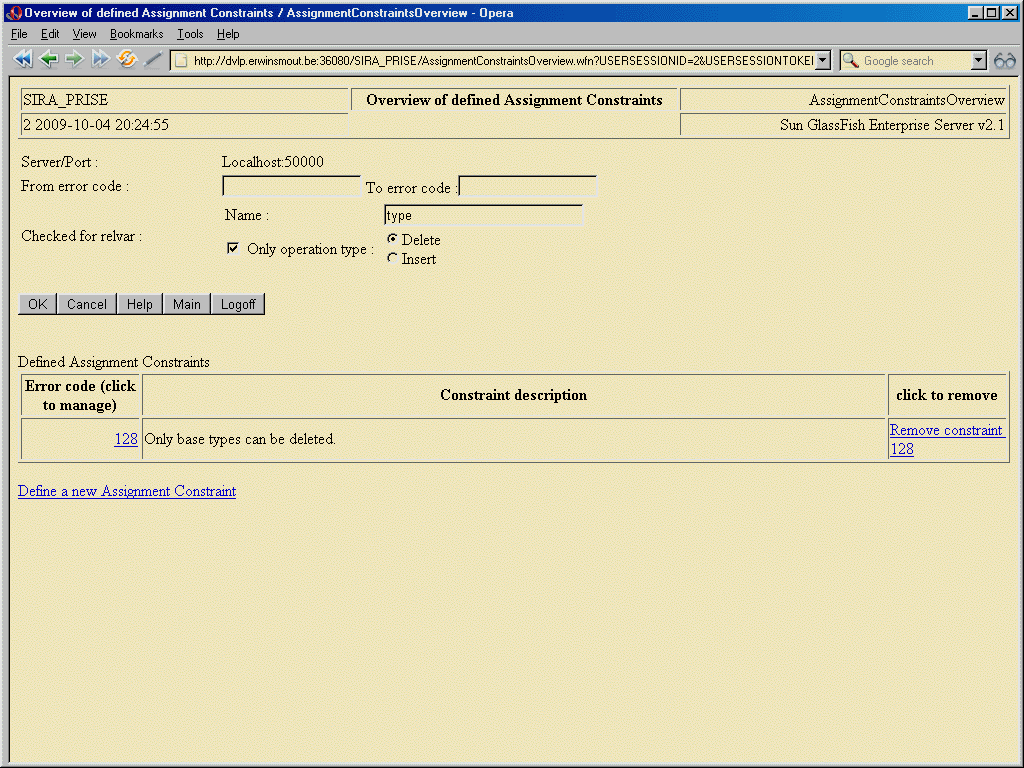
The "Overview of defined Assignment Constraints" functions allows to display an overview of all assignment constraints that meet certain selection criteria specified by the user :
This function can be used to define new Assignment Constraint (and the corresponding constraint message text) and have it checked for a relvar :
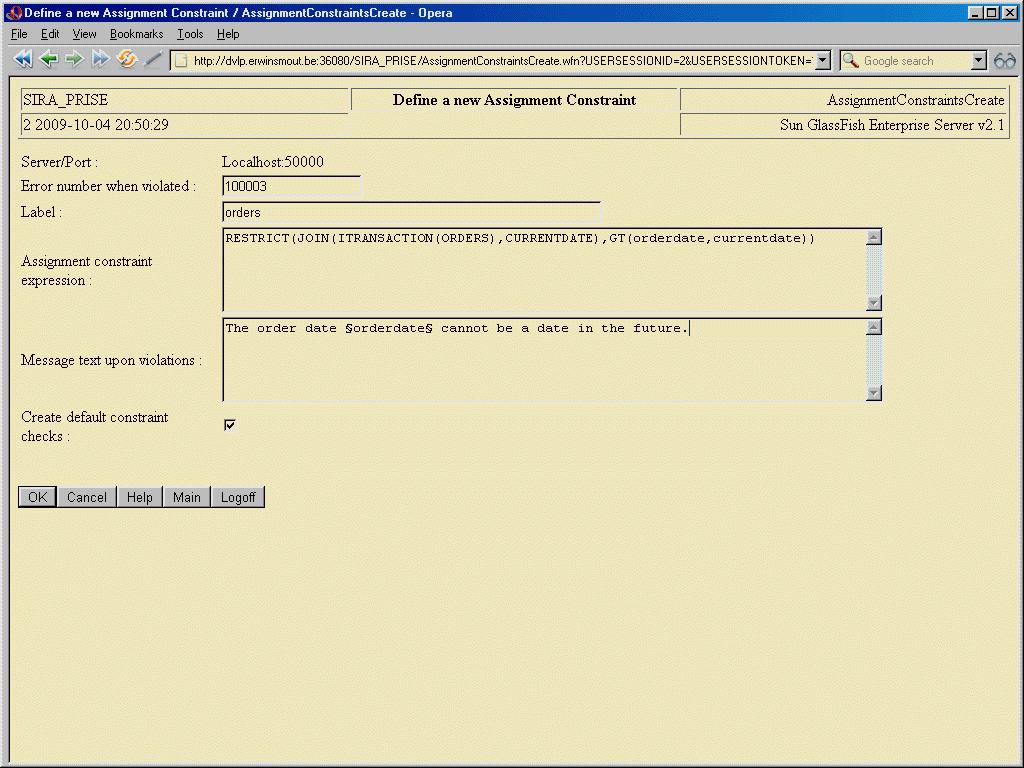
Checking the "Create default constraint checks" will automatically register constraint checks in the catalog to cause this constraint to be checked for every :
This function allows to modify the details of an Assignment Constraint :
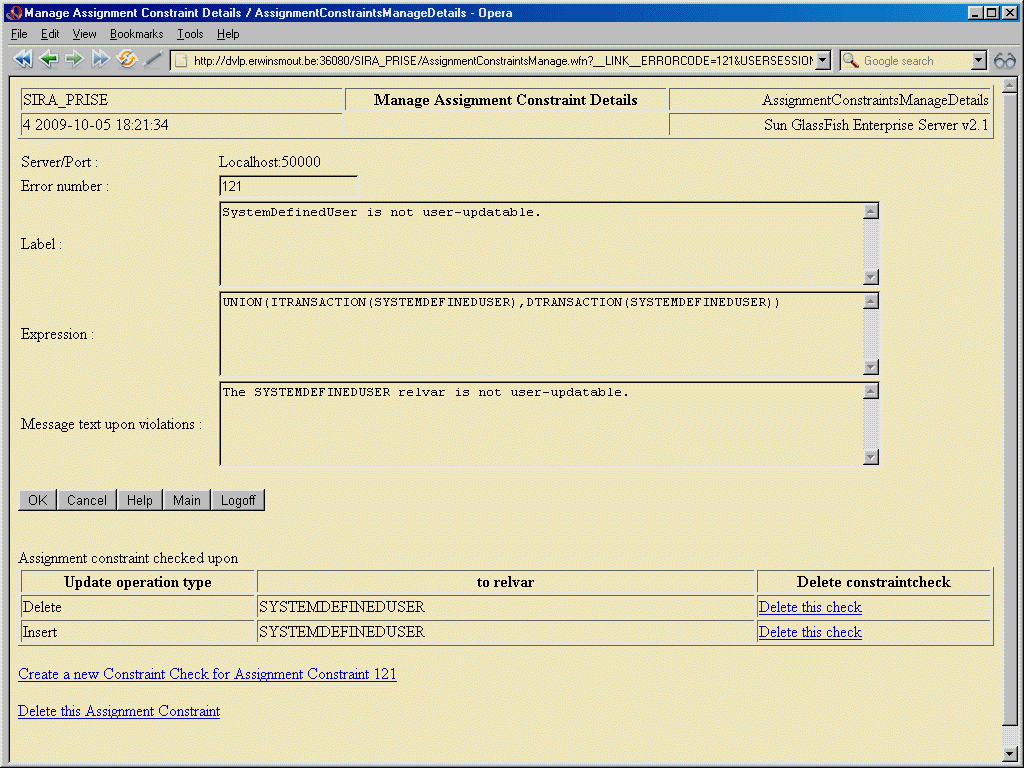
This window also lists the update operations that trigger verification of this constraint, including links that allow to go create additional checks, ("Create Assignment Constraint Check" function), or remove existing ones ("Delete Assignment Constraint Check" function).
No particular remarks apply.
This function can be used to define additional Assignment Constraint Checks for an existing assignment constraint :
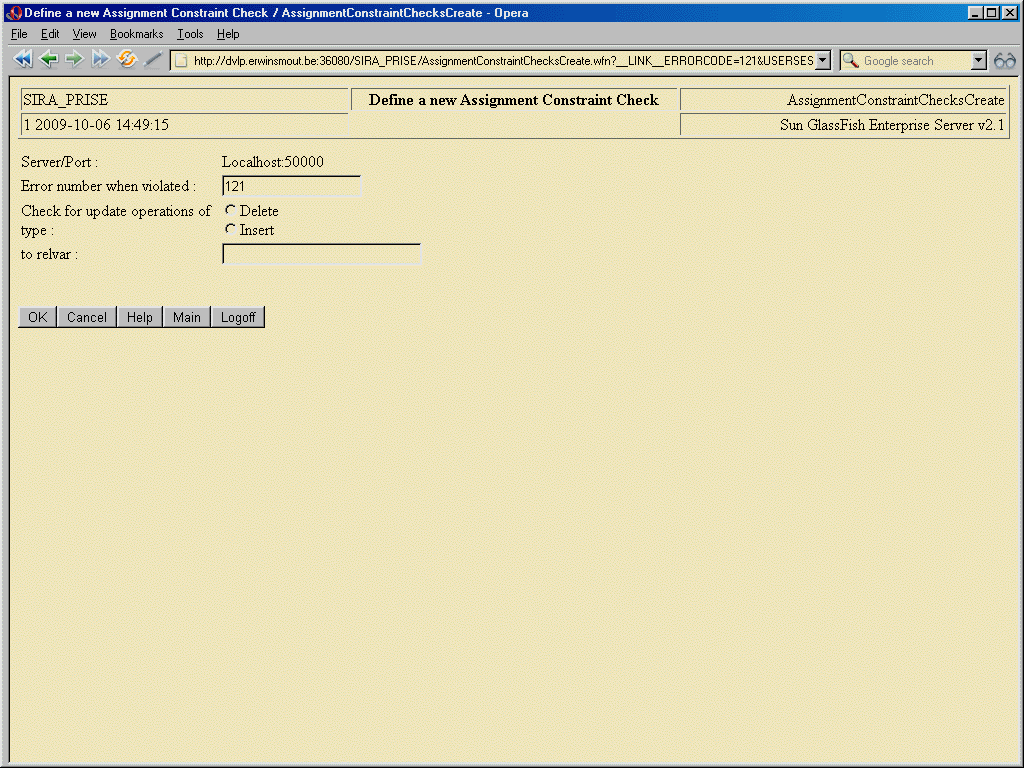
Hitting OK will cause the indicated assignment constraint to be checked upon each update operation of the indicated type to the indicated relvar.
No special remarks apply.
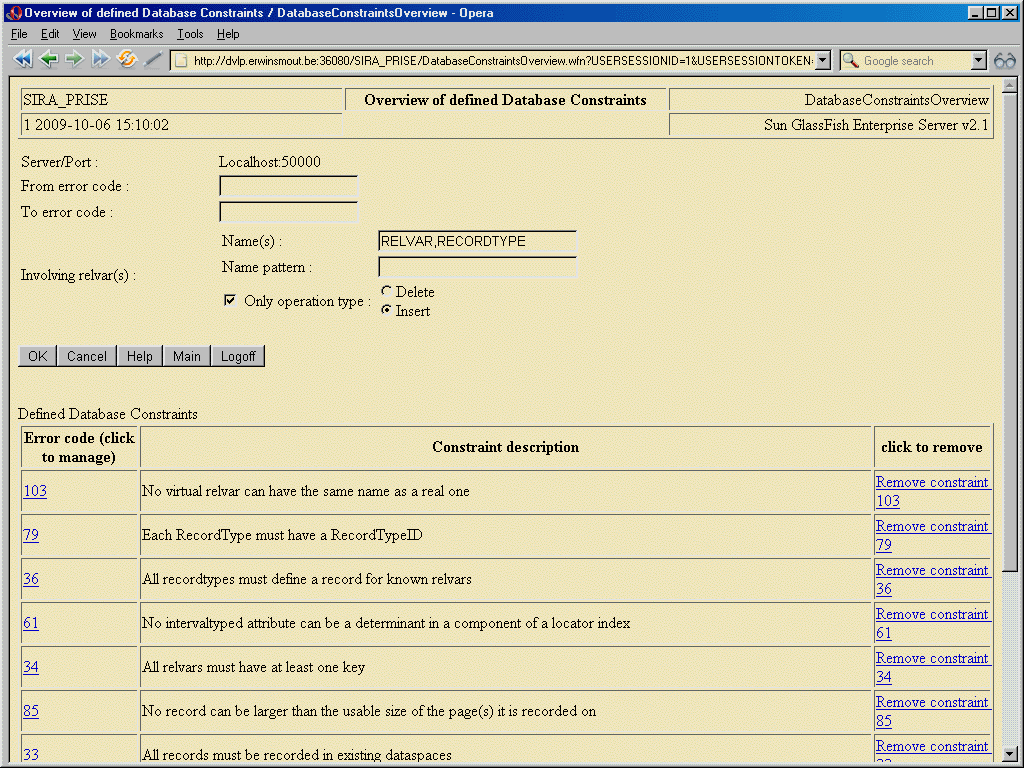
The "Overview of defined Database Constraints" functions allows to display an overview of all database constraints, or all database constraints that meet certain selection criteria that can be specified by the user.
Please note that a constraint with the same error code as specified in the "To error code" box, will not be displayed. "To" here means "to, but not including" specifically.
Entering one or more relvar names as a comma-separated list or implying a restricted number of relvars by specifying a relvar name pattern, will only list those database constraints in which the named relvar is mentioned, that is, only those database constraints that can be violated by an update operation to a relvar that appears in the comma-separated list, or matches the pattern.
The "Only operation type" buttons are for further restricting the listed constraints to only those database constraints that can possibly be violated by an update of the indicated type to any of the matching relvars.
After having clicked OK, the list of constraints that meet the given criteria will be displayed, with links allowing to remove the constraint ("Delete Database Constraint" function), to change some displayed constraint ("Manage Database Constraint" function), or to define a new one ("Create Database Constraint" function).
This function allows to define new database constraints.
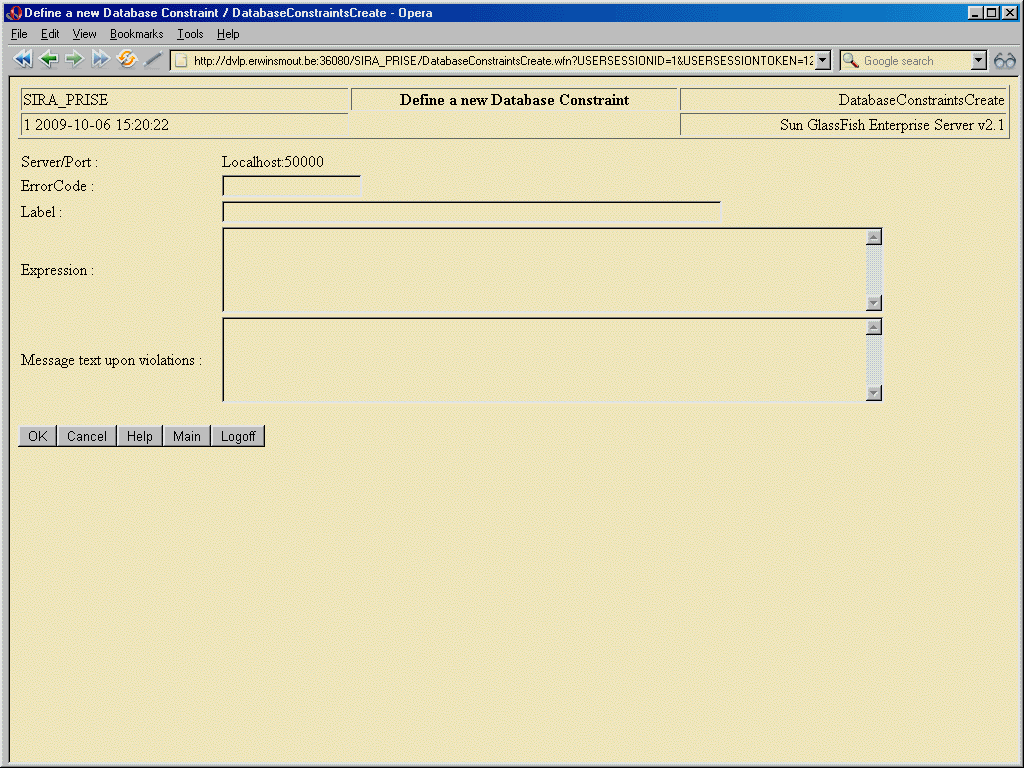
The constraint expression, its label (description) and its identifying error code must be entered here. The "message text upon violations" can be entered or left blank. If it is entered, then violations of this new constraint will be signaled to the user using the text entered here. If it is not entered, a violation of this new constraint will be signaled to the user using a standard message, which includes only the errorcode as a usable reference.
Remember that the expression defines a relational expression in particular, and the constraint is to the effect that the value of this expression must at all times remain empty.
The message text can contain attribute names of the expression, enclosed in paragraph marks '§' (Unicode 00A7). When the system signals a violation to the user using a message text entered here, the system will first replace all such occurrences in the violation message with actual attribute values drawn from a tuple in the expression that became nonempty.
This function allows to modify the details of an existing database constraint :
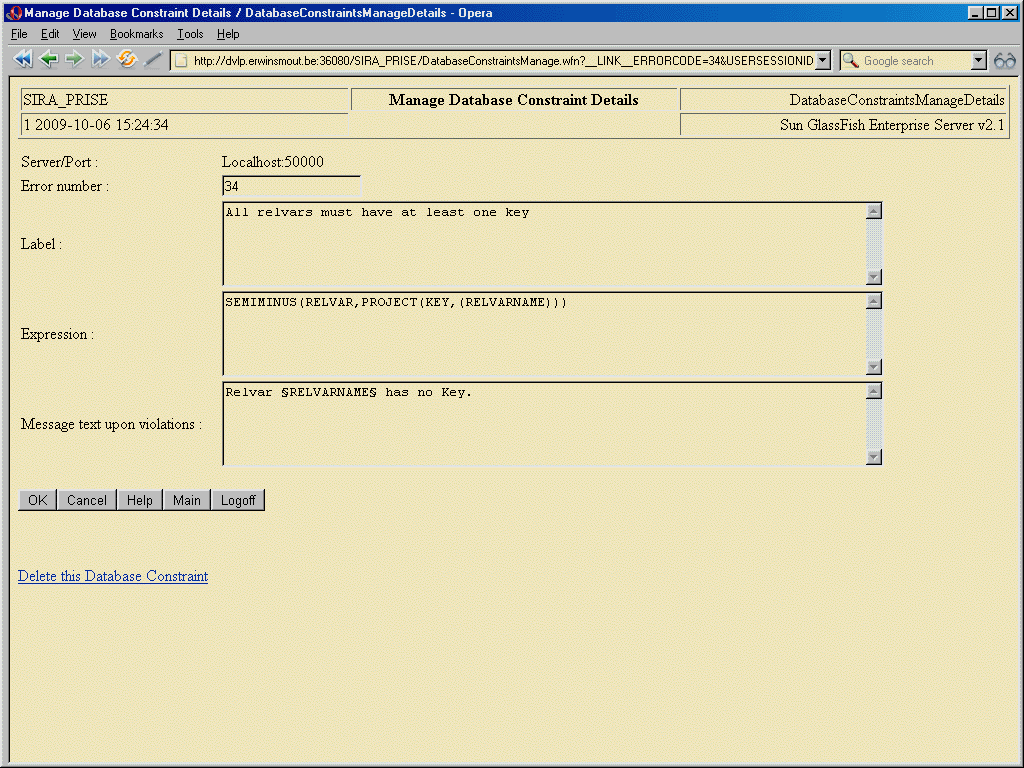
No specific remarks apply.
The "Overview of defined Triggered Data Actions" functions allows to display an overview of all Triggered Data Actions that meet the specified selection criteria :
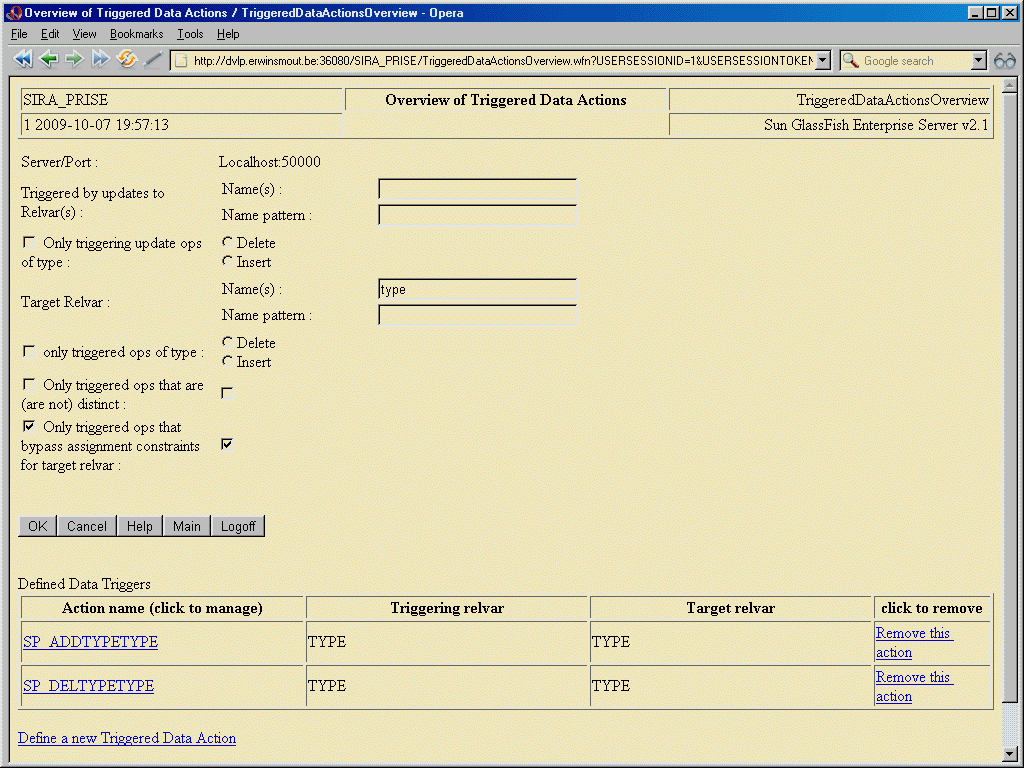
After having clicked OK, the list of triggered data actions that meet the given criteria will be displayed, with links allowing to remove them ("Delete Triggered Data Action" function), to change them ("Manage Triggered Data Action" function), or to define a new one ("Create Triggered Data Action" function).
This function allows to define new triggered data actions.
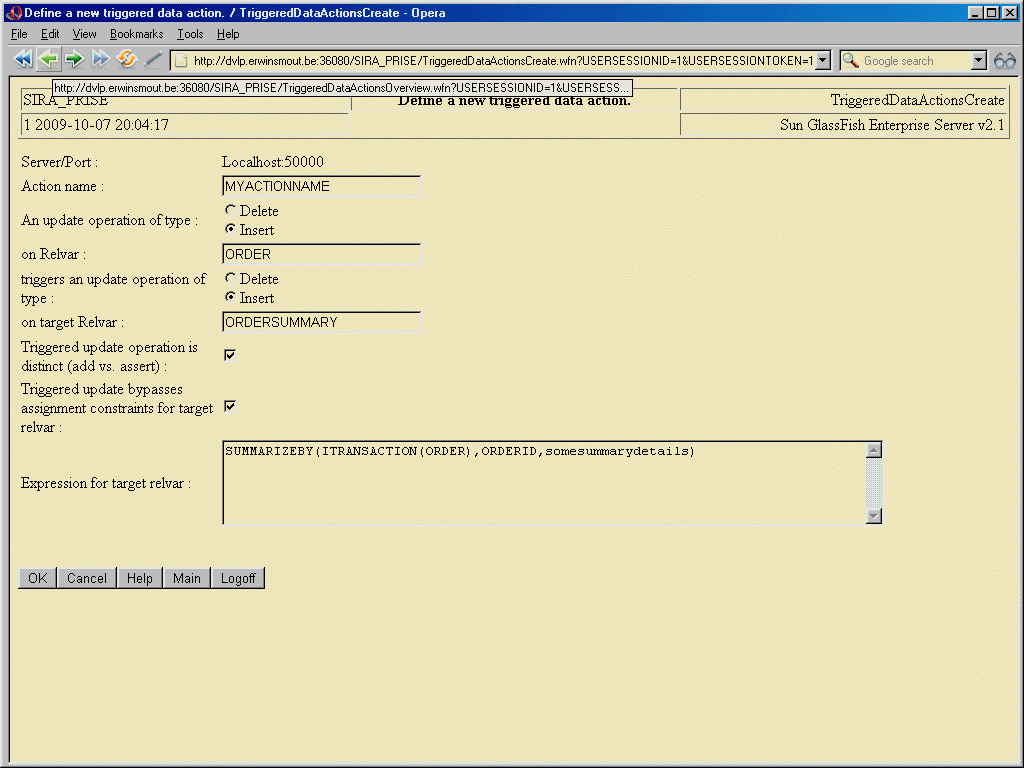
This function allows to modify the details of an existing Triggered Data Action.
No specific remarks apply.
This function allows to produce an overview of existing physical dbms files :
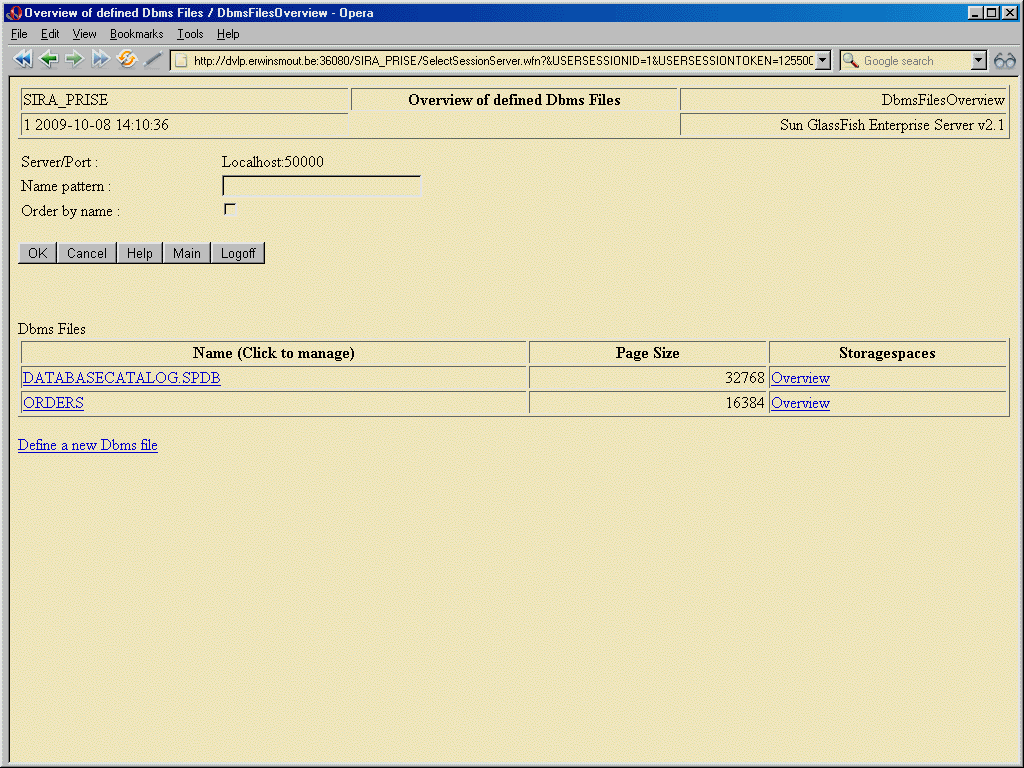
Available links allow to view/modify the details of a dbms file's definition, produce an overview of the storagespaces that have been defined in a particular file, or create a new file.
This function allows to create a new dbms file :
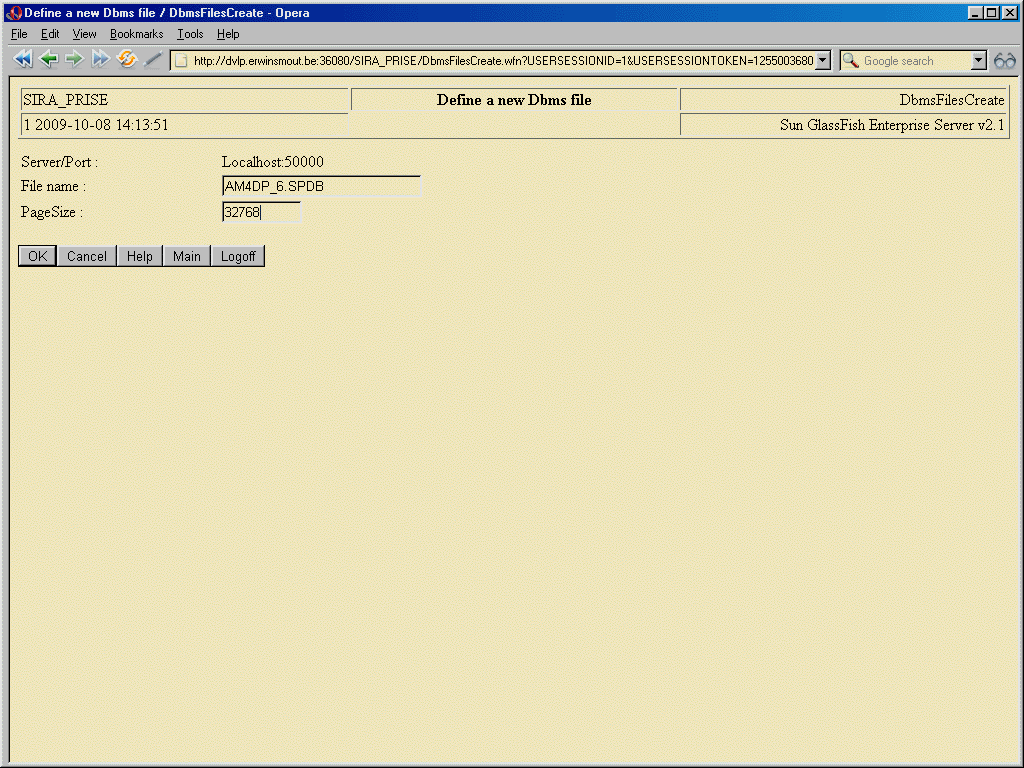
After specifying a filename and a valid page size, and hitting OK, the system will attempt to create the physical file in the server's configured database directory.
This function allows to rename an existing dbms file (modification of the page size is not yet supported by SIRA_PRISE).
This function allows to delete a dbms file. This is only possible if none of its storage spaces are currently in use.
After hitting OK, the file will physically be removed from the server's configured database directory.
This function produces an overview of storage spaces defined for some dbms file :
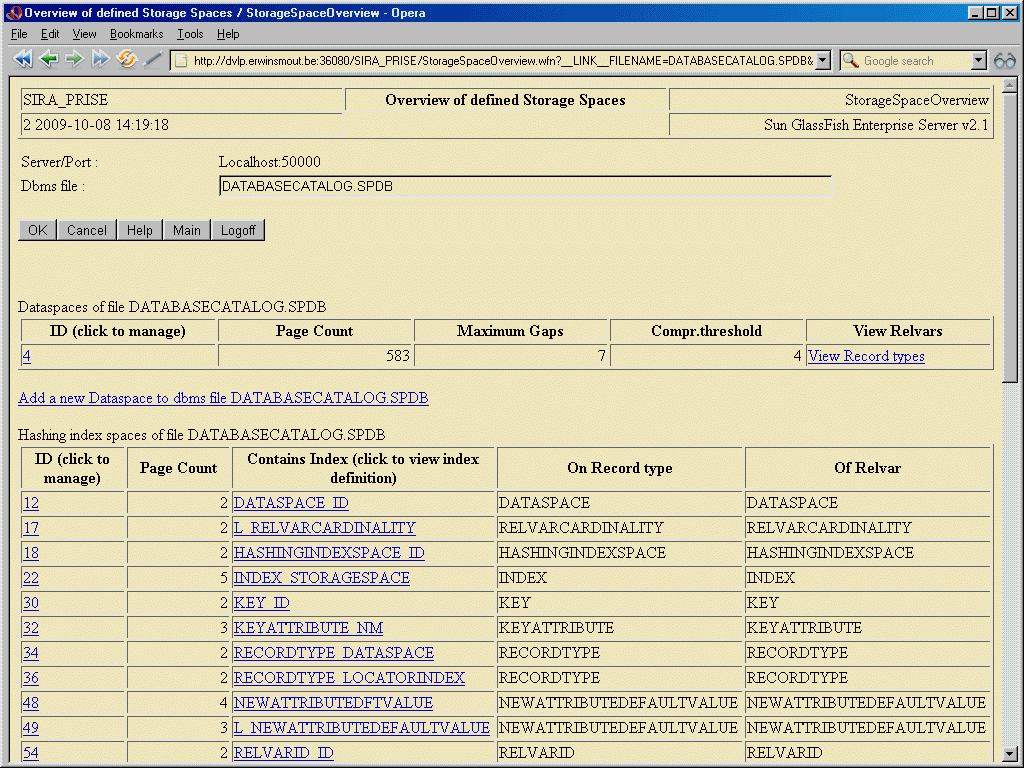
The storage spaces defined for the specified dbms file, are listed per type of storage space.
Available links allow to modify the details of a storage space, to view an overview of the recordtypes a dataspace contains, to view an overview of the indexes stored in a particular index space, to view the definition of the index stored in an index space if that index space is a single-index storage space type, or to create a new storage space of some particular type.
This function allows to append a new data space to an existing dbms file :
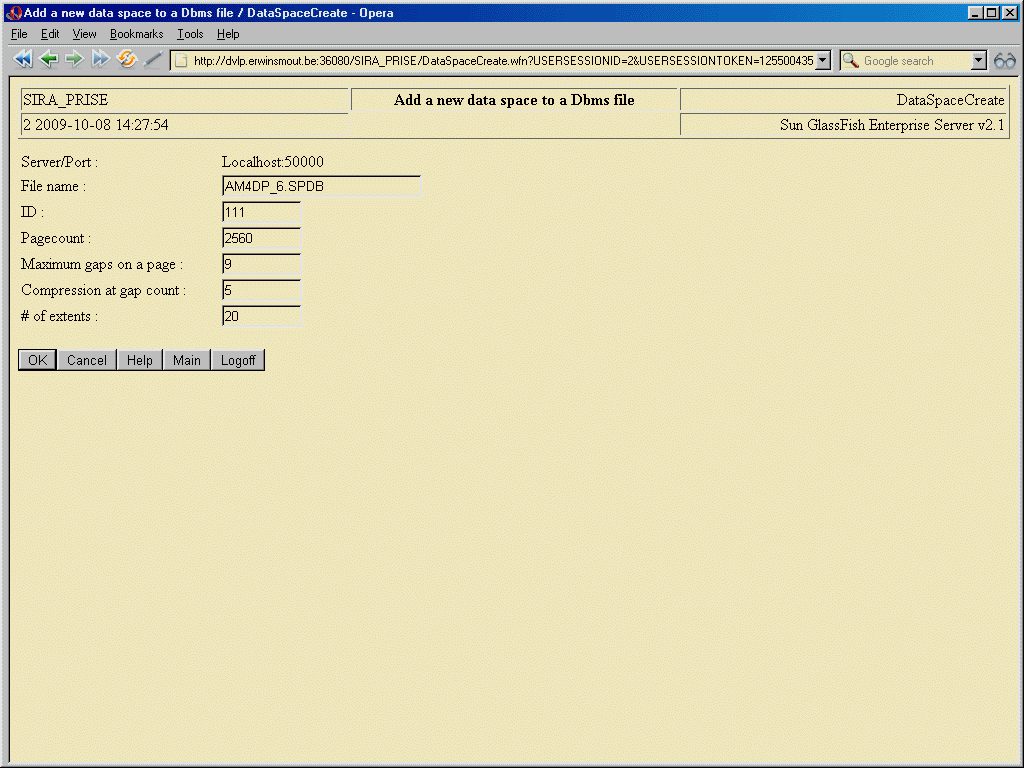
This function allows to change the extents count of a defined dataspace. Note that this is only possible if the dataspace is not in use by any record type.
This function allows to append a new hashingindexspace to an existing dbms file :
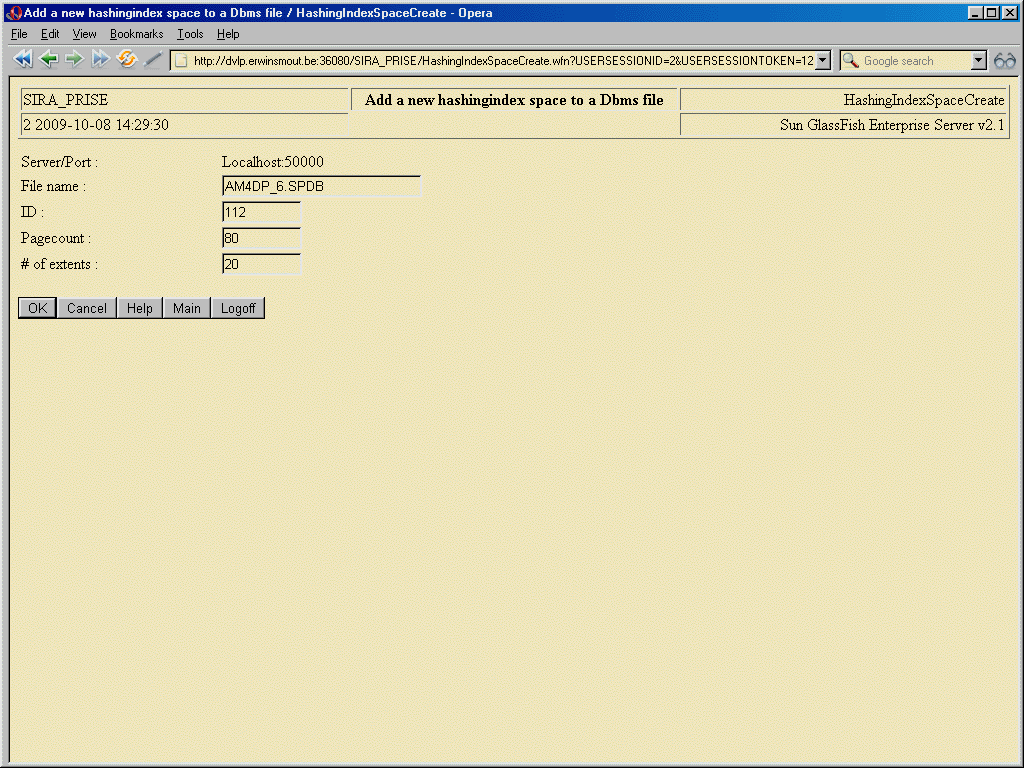
This function allows to change the extents count of a defined indexspace. Note that this is only possible if the dataspace is not in use by any index.
This function allows to append a new treeindexspace to an existing dbms file :
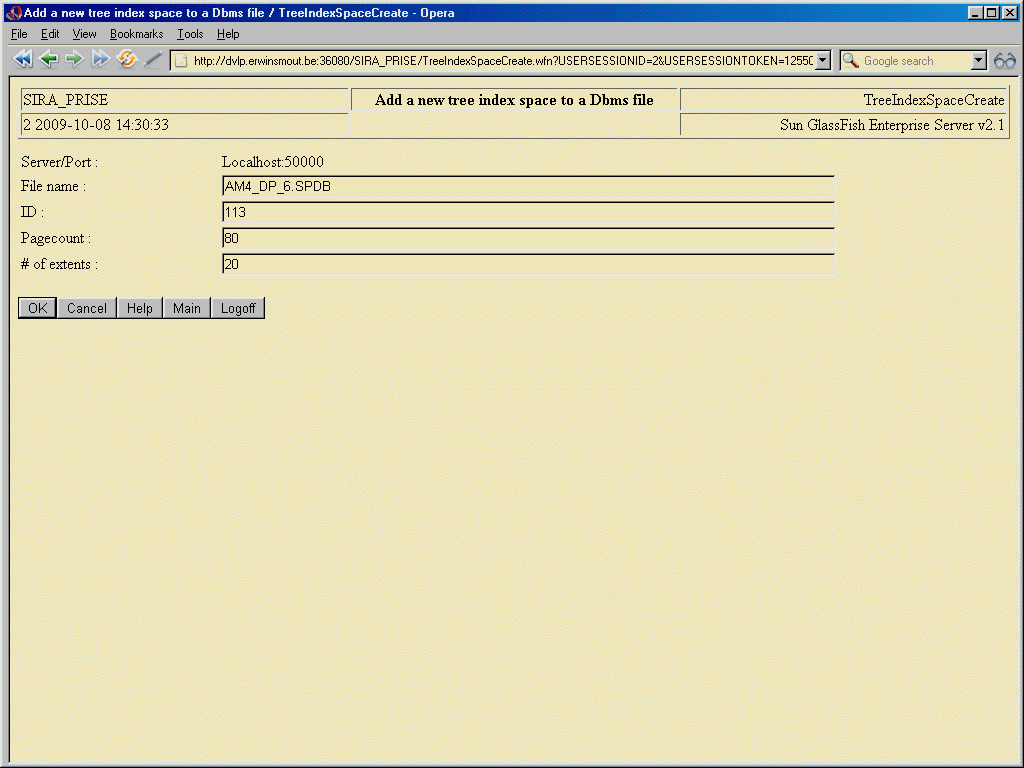
This function allows to change the extents count of a defined indexspace. Note that this is only possible if the dataspace is not in use by any index.
This function allows to append a new hashingindexspace to an existing dbms file :
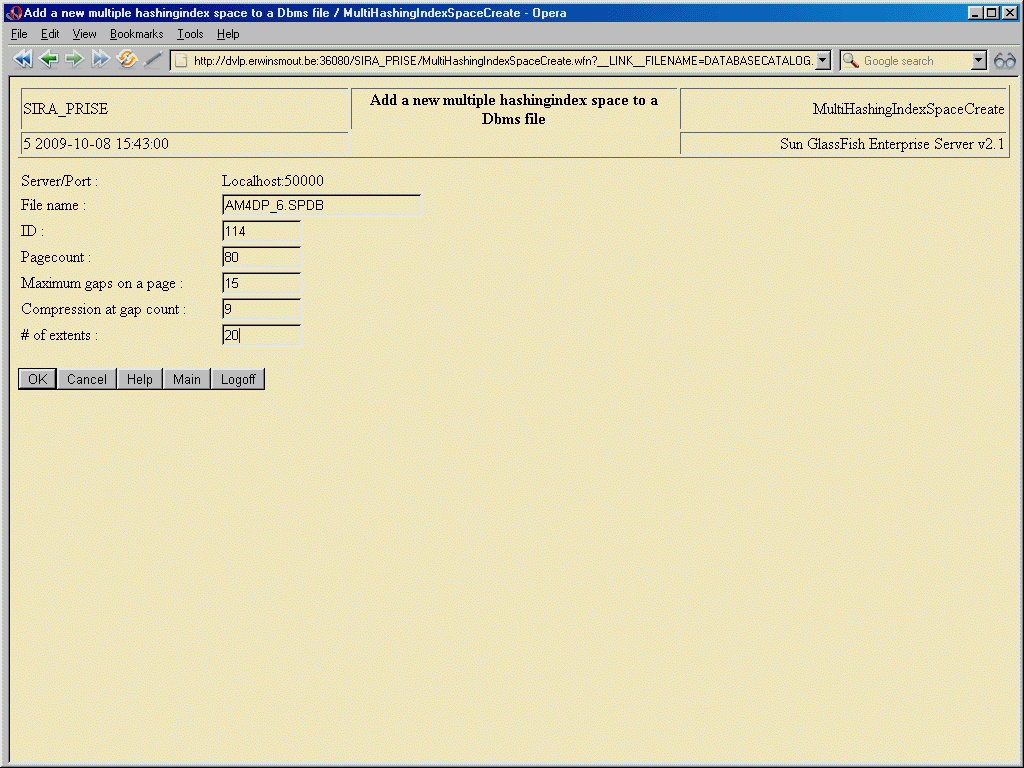
This function can be used to define record types (either the first or an additional) for a relvar :
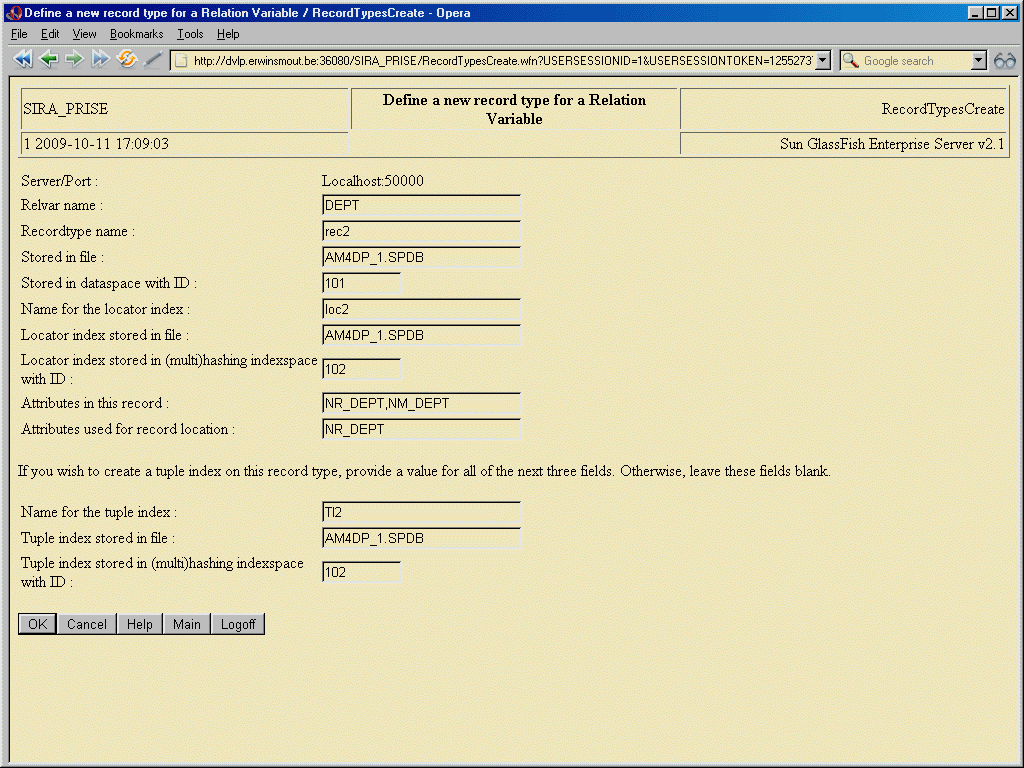
Using this function, a new record type can be entered for a relvar. Apart from the relvar name and the record type name, the identification of the data space where the records of this type will have to be stored, has to be entered, as well as all data needed to define the locator index that will be used for determining the physical location of the records of this type : the name of the locator index plus the identification of the hashingindex or multihashingindex space where the locator index will be stored.
Optionally, the attributes whose value will be used by the record location algorithm can also be entered as a comma-separated list of attribute names. Each attributename given will be registered as an indexcomponent in the new locator index. Enter these as a comma-separated list of attribute names in the 'attributes used for record location' field (ordinal positions of these indexcomponents will be as in the order in which they are specified on this form).
RecordAttributes tuples will be created for the attributes mentioned in the 'record attributes' field (once again, enter these as a comma-separated list).
If this record type is an additional one, then specifying the fields concerning a Tuple Index is mandatory (specifying the fields concerning a Tuple Index is optional if this record type is the first one being created for a relvar).
If this record type is the second one that gets created for a relvar, and the existing one does not have a tupleindex yet, then the function will prompt you for the data needed to -additionally- create a tupleindex on the records of the already existing record type :
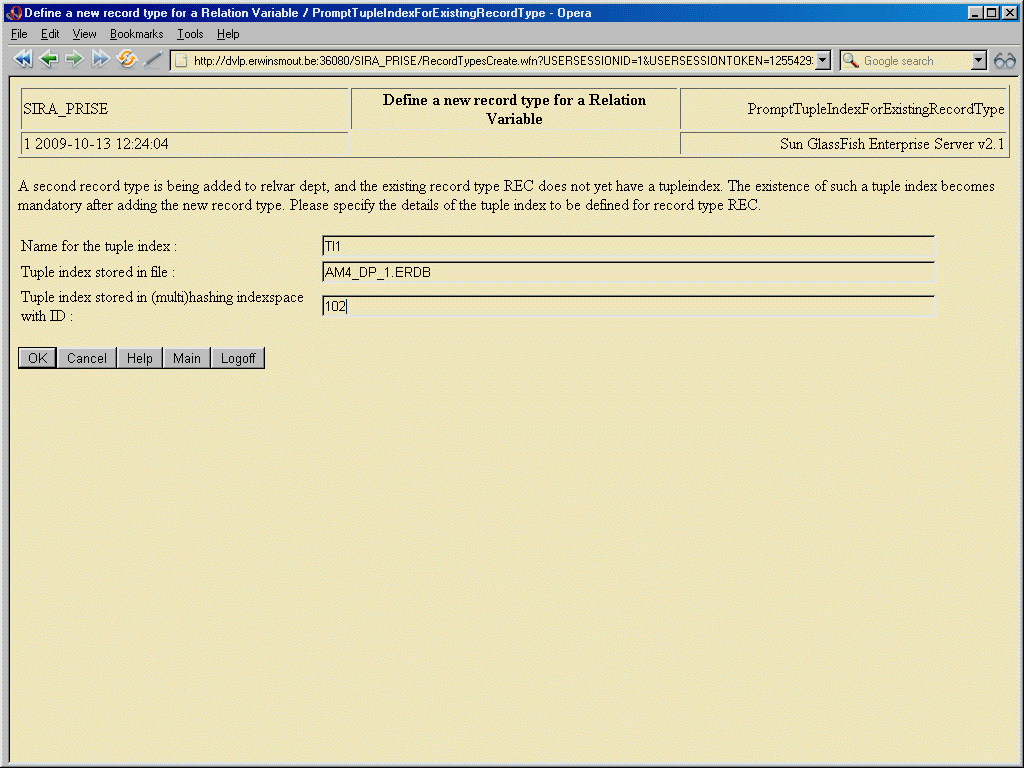
Hitting OK here will create the record type, register the record attributes, the locator index for the record type and the specified record location attributes. Then, if the relvar already has recorded tuples, a record of this type will be created for each existing tuple, plus all necessary entries in all created indexes for this recordtype (and possibly in the new tupleindex for the formerly existing record type as well).
This function is used to modify the details of an existing record type :
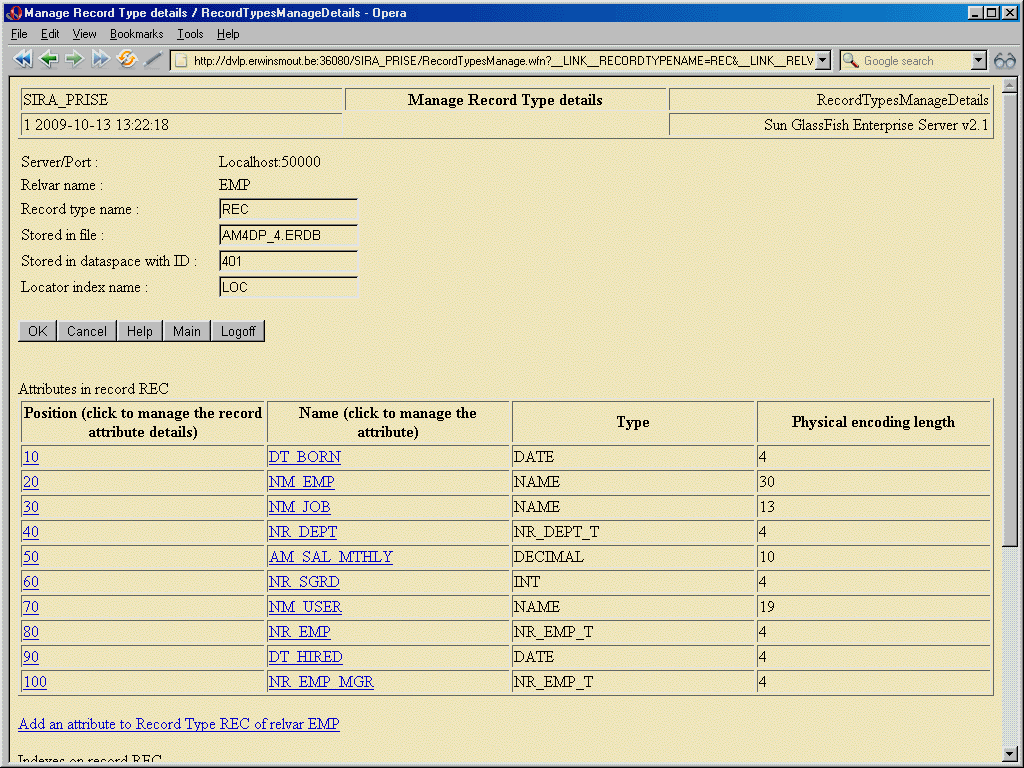
The table 'Attributes in record ...' lists the attributes that are recorded in (records of) this record type. Available links allow to change the record attribute details (function "Manage Record Attribute Details"), add a new attribute of the relvar to the record (function "Create Record Atribute"), or to manage attribute details (function"Manage Attributes").
The table 'Indexes on record ...' lists the indexes that are defined on this record type. The available links allow you to invoke the "Manage Index" function, or to invoke the "Create Index" function.
No specific remarks apply.
This function produces an overvies of the record type meeting certain criteria :
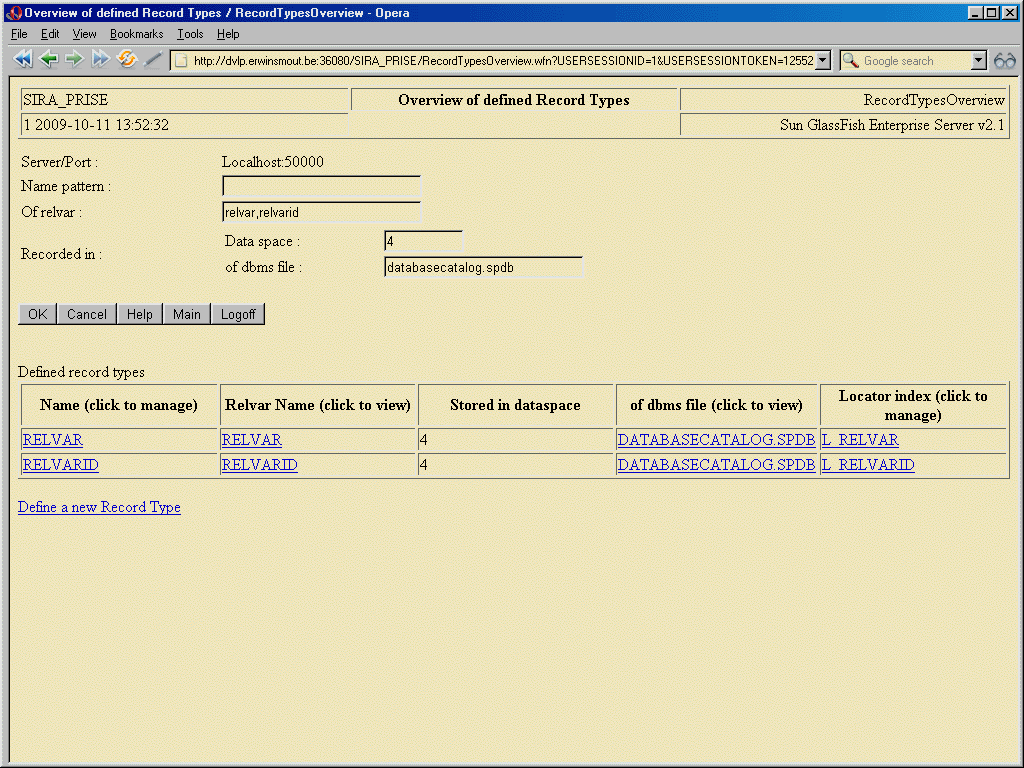
Please note that the "name pattern" field pertains to relvar names, not to record type names.
This function is used to add an attribute that participates in a relvar, to an existing record type of that relvar :
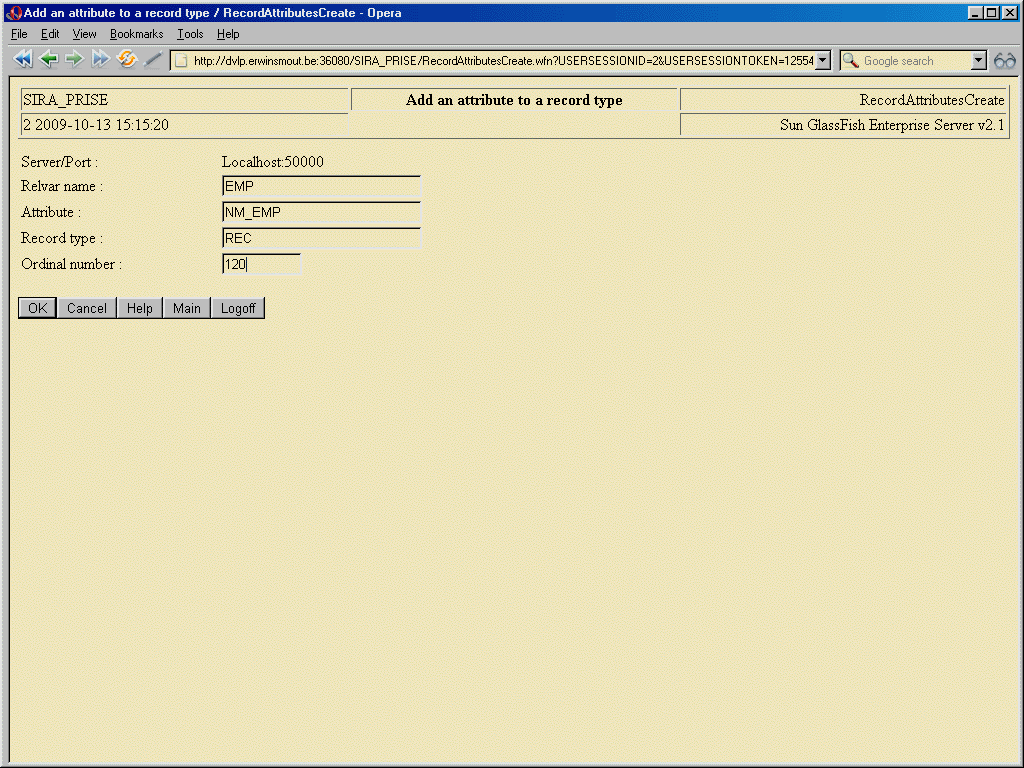
The system will respond by including the value of the attribute in each tuple of the relvar in the record of this type that exists for each tuple.
This function allows to modify the details of a Record Attribute :
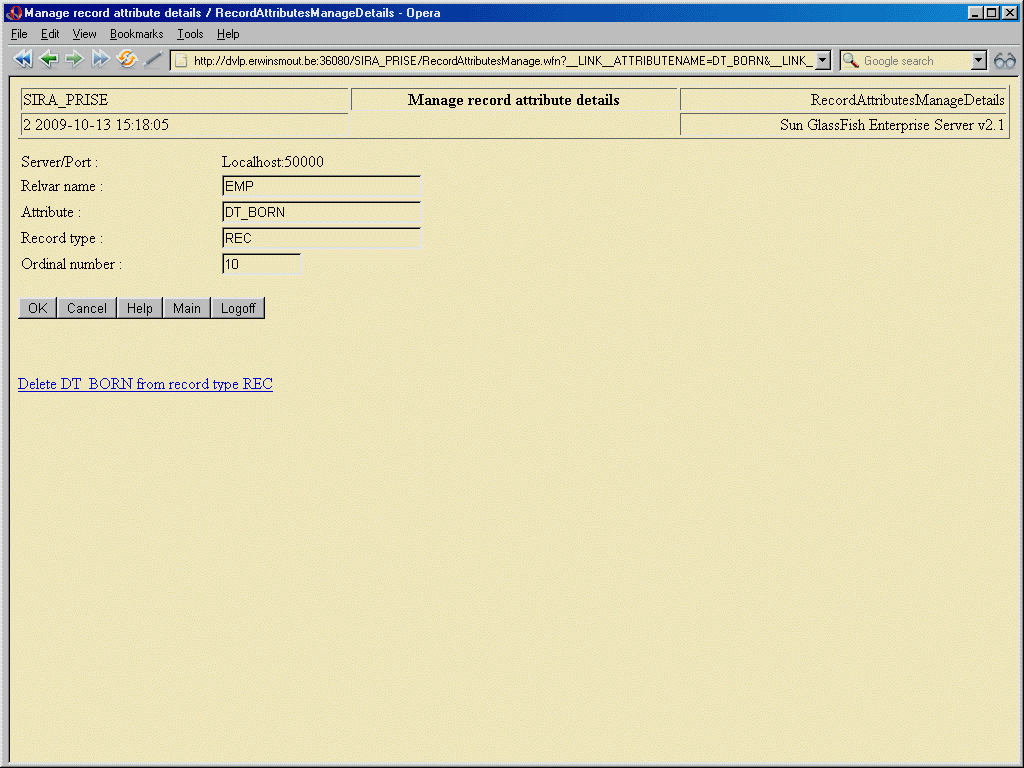
No specific remarks apply.
This function can be used to produce an overview of indexes according to user-specified selection criteria :
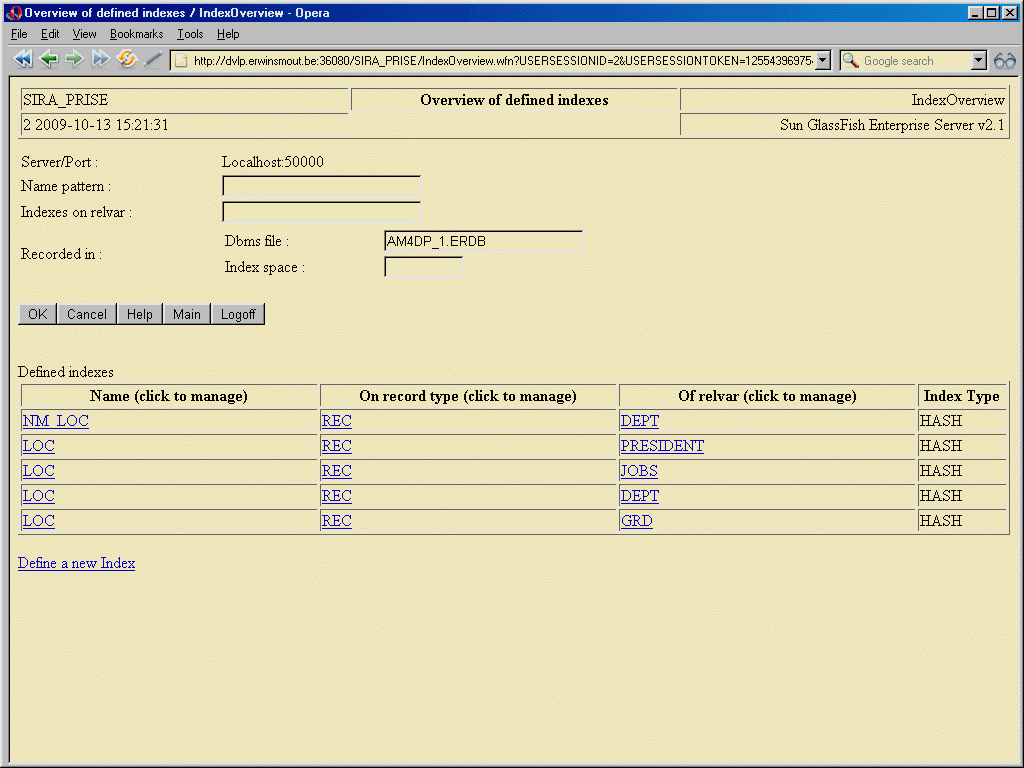
Any combination of relvar name, file name and storagespace id can be given, the indexes listed will be all and exactly those that match all the criteria specified.
This function allows to define additional indexes on a record type of some relvar :
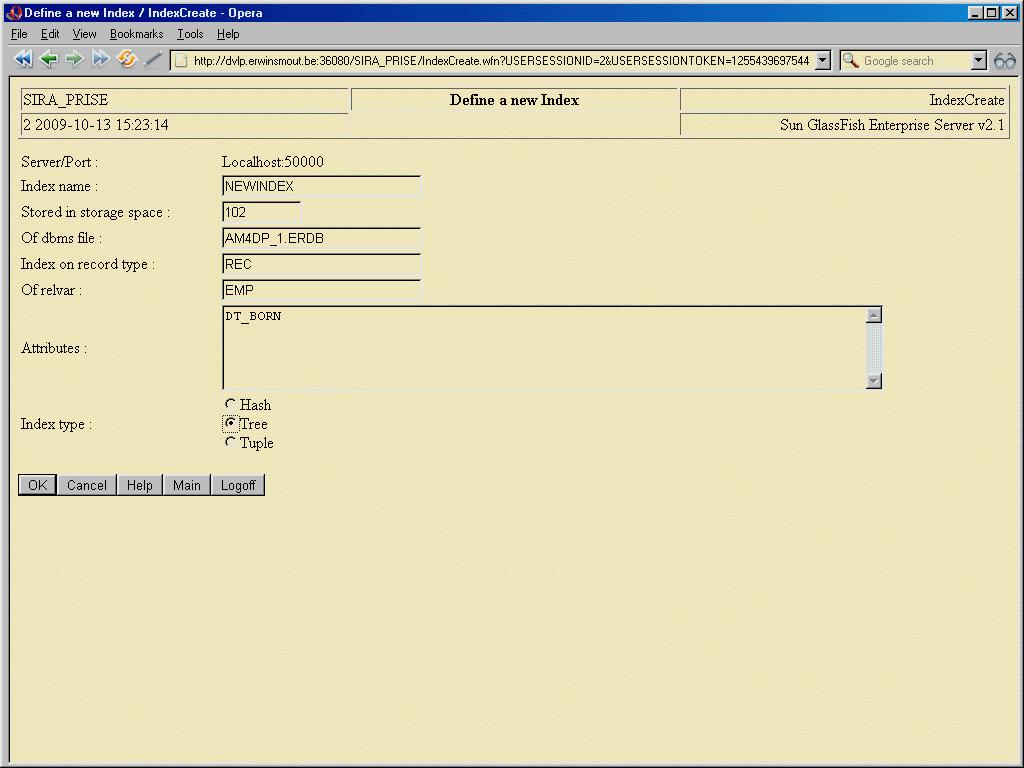
The index type specified on this window must match the type of storage space specified in the 'storage space' and 'filename' fields. This is intended as a cross-check to prevent the user from creating an index of a type he didn't intend the index to be.
Optionally, the attributes to be indexed can be specified as well. IndexComponents will the be created for each named attribute, the ordinal positions of the indexcomponents will be such that the order of the indexcomponents is the same as the one specified on the form.
This function is used to modify the details of an existing index :
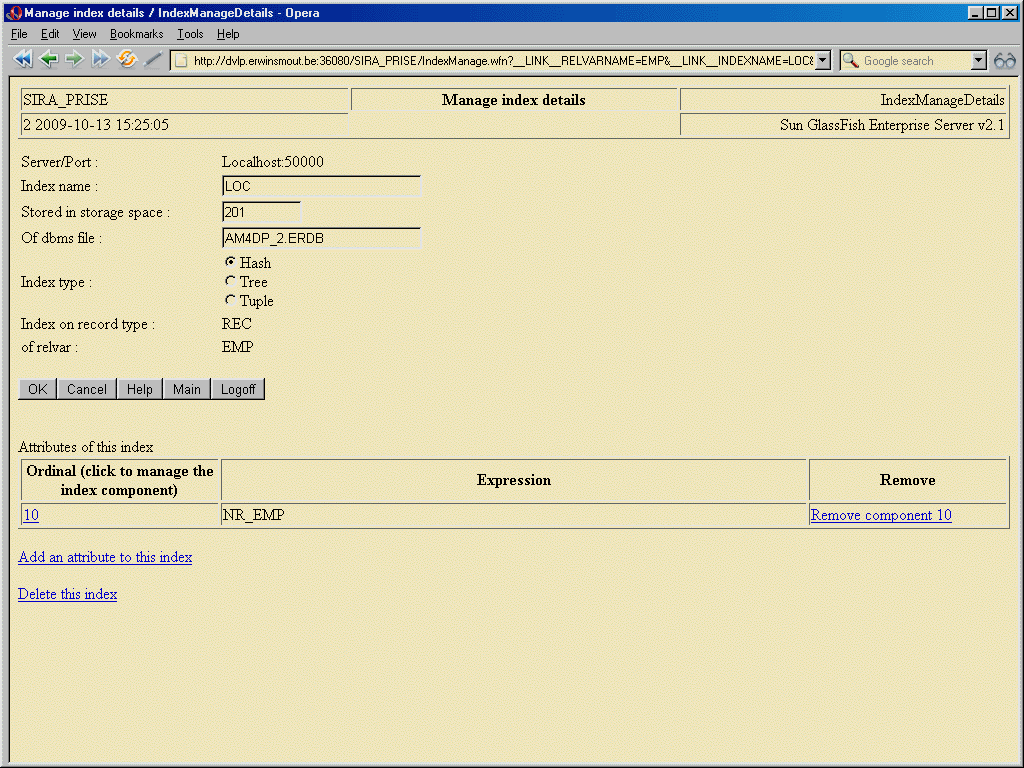
The window lists the components of the index. Links are available to manage the details of each index component, to remove the index components, and to delete the index itself.
After hitting OK to confirm deletion of the displayed index, all information pertaining to the index will be deleted (a.o. the declaration of all its components), and in particular its declaration as a tuple index as well.
Indexes that are defined to be the locator index for some record type, cannot be deleted using this function.
This function allows to add a component to an existing index :
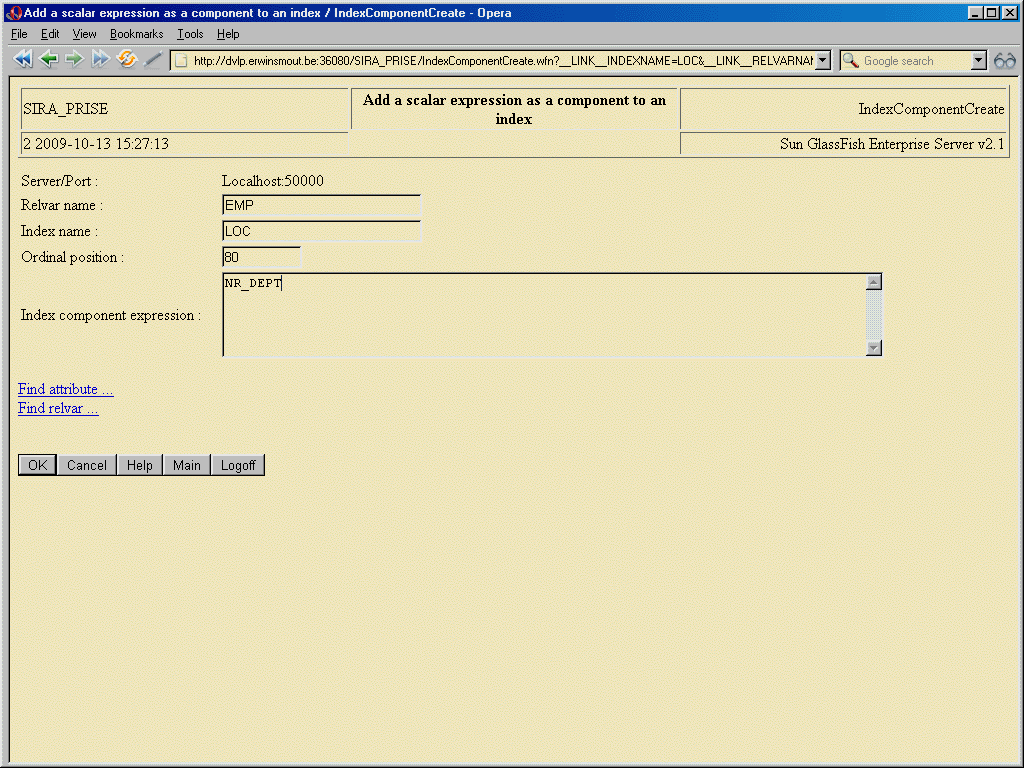
After hitting OK, the system will attempt to create this new component in the index at the position specified by the user. This involves the complete rebuilding of all existing entries in the index.
This function is intended to change details of an index component's definition. After hitting OK, the system will attempt to modify the existing index definition in the sense specified by the user. This involves the complete rebuilding of all existing entries in the index.
This function allows to delete a component from an index definition. After hitting OK, the system will attempt to modify the existing index definition in the sense specified by the user. This involves the complete rebuilding of all existing entries in the index.
If you want to set up the web client to allow users to identify and authenticate themselves, some setup will have to be done. This is described in this section.
Defining users such that they are known to the web client (or rather actually, the presentation layer package underlying the web client), must be done by using the "Define User" function of the presentation layer package. If you followed the instructions for installing this package, then you should be able to invoke this function by opening a web browser and pointing it to the presentation layer package's web application URL, e.g. http://localhost:18080/WAAR. You should then get to see the application's welcome window :
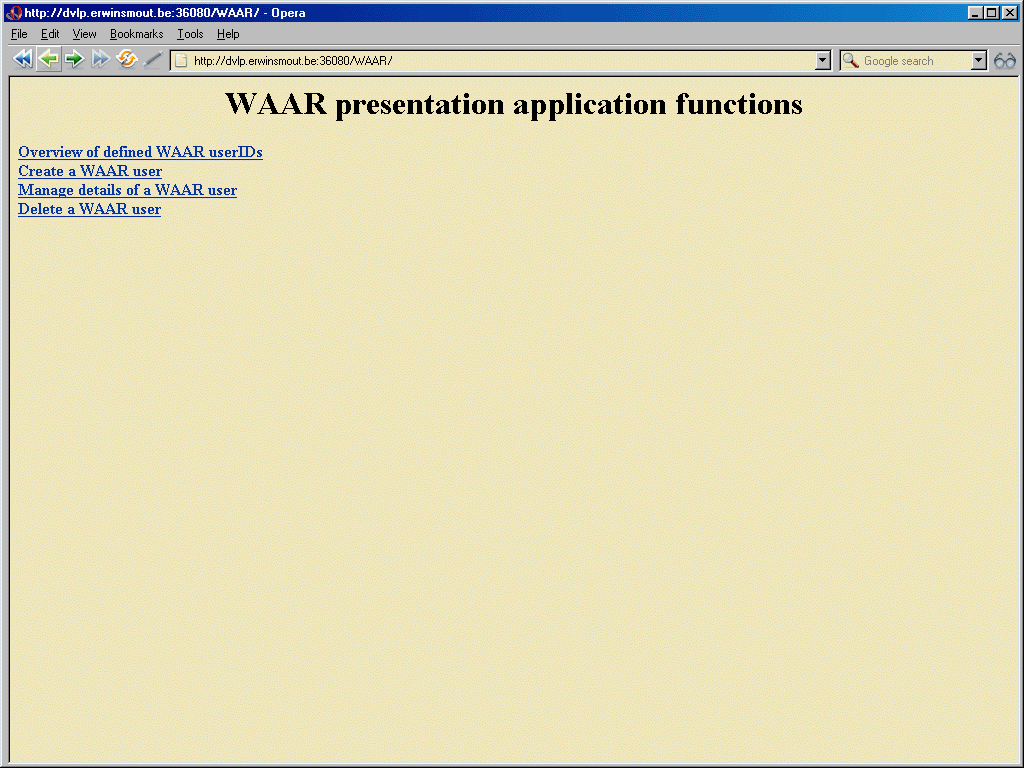
The function you need to select is, obviously, "Create a WAAR user". Selecting this option will first take you to the logon screen. If this is the first userID you will be creating, you can log on using the system-defined user "waaradministrator" and password "WaarAdministrator". In that case, you will also be required to change the password for this user. As this system-defined user is also the "emergency userID", it is important to keep the changed password in a safe place. After logging on as the WAAR administrator, you get to the window that will allow you to register a new WAAR userID :
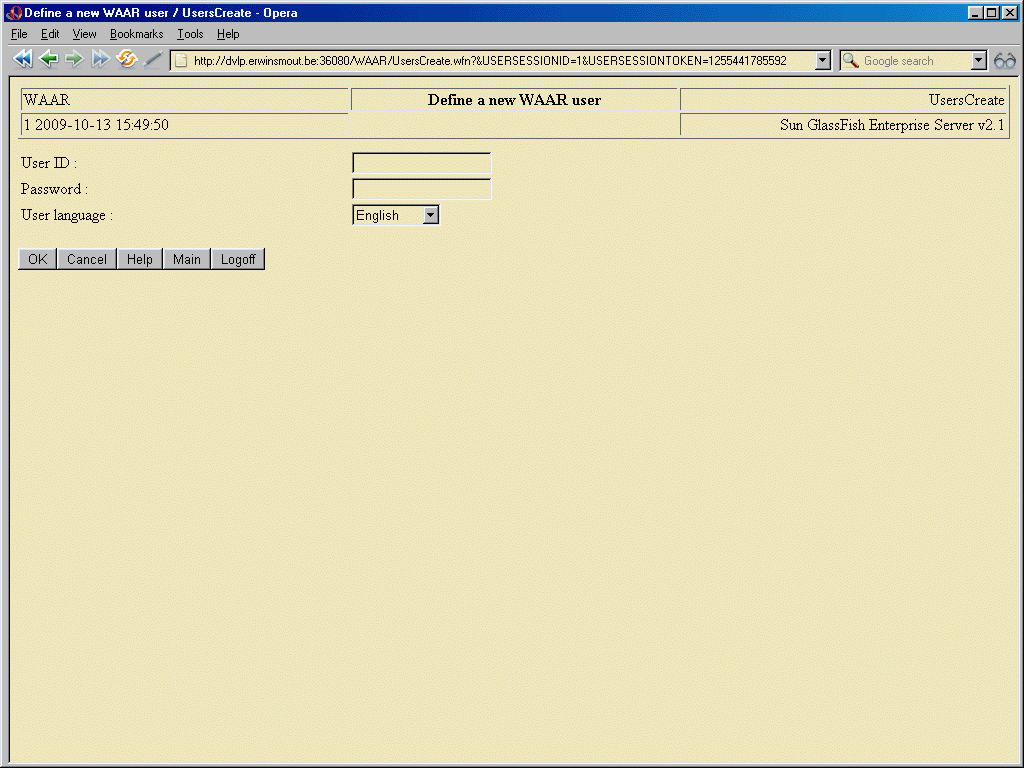
The password you enter here must be used by this user for his first logon. He will be required to change it to a password of his own choice when he first logs on.
Apart from defining the userID to the presentation layer package, the user must also be defined to the SIRA_PRISE server he will be using/administering. This can be done using this web client's "Create User" function, or using any other way to update the involved server's USER relvar (please see the appropriate section in the "User and Installation Guide" for more info).
Apart from defining the users to both the web client and the server, the web client itself must also be made known to the server, and be configured such that it is able to authenticate itself to the server.
The first step is to define the web client to the server. This can be done using the web client's "Create Client" function, or any other means that may be available for registering tuples in the server's CLIENT relvar. Note that this step must be done using an anonymous transaction, since this is likely to be the first client to be registered to the server.
The next step is to generate a key pair and make that available to the web client package. This can be done using the keytool program that comes standard with any java installation :
keytool -genkey -keystore siraprisewebclient.keystore -storepass password -alias SIRAPRISEWEBCLIENTMD5WITHRSA -keyalg RSA -keysize 1024 -sigalg MD5WITHRSA -keypass password -dname cn=SIRAPRISEWEBCLIENT -validity 7300
In this command, the keystore name, the keystore password and key password must be typed exactly as is. The -alias value must be equal to the concatenation of the client name ('SIRAPRISEWEBCLIENT') and the chosen signature algorithm name ('MD5WITHRSA' in the example). Other signature algorithms can be chosen if they are supported by both the JVM in which the web client will be running, and the JVM in which the server will be running.
The private part of the key pair is now stored in a file named 'siraprisewebclient.keystore', but it must still be made available to the web client. To that effect, it must be packaged in a jar file, and that jar file must be placed in the web application server's class path. Packaging the keystore in a jar file can be done using java's jar tool :
jar cvf spwc.jar siraprisewebclient.keystore
This jar file must then be copied to the same directory where you also installed the sp.webclient.jar file.
The next step is to extract (a certificate holding) the public key from the key pair, and register this public key in the server. Extracting a certificate can be done using, once again, java's keytool program :
keytool -export -keystore siraprisewebclient.keystore -storepass password -alias SIRAPRISEWEBCLIENTMD5WITHRSA -keypass password -file spwc.crt
The spwc.crt file now contains the certificate to be registered in the server. To achieve this, copy the file to the server's directory and use either the provided BAT file or issue the java command contained therein :
SP.REGISTERCLIENTX509CERTIFICATE.BAT
spwc.crt
java -cp sp.server.jar;license.jar
be.SIRAPRISE.server.RegisterClientX509Certificate spwc.crt
The final step is to configure the web client such that it will actually use the signing mechanisms to authenticate itself to the server. When first installed, the web client is not configured to do this.